How to make a custom marker editor with UIElements : AnimatorTriggerMarker
Marker feature comes in 2019.1 at the same time as UIElements going out of experimental. That means an editor for marker is just the perfect place to use VisualElement based drawer, you don't have to care about incompatibility with earlier versions.

Marker feature comes in 2019.1 at the same time as UIElements going out of experimental. That means an editor for marker is just the perfect place to use VisualElement based drawer, you don't have to care about incompatibility with earlier versions.
The goal
I wish to make a marker that sends a notification (itself) with a string. This string should be used to .SetTrigger on the Animator. I will call this AnimatorTriggerMarker.
This marker is the final glue that will allow me to animate my UI intro which ideally should be orchastrated by the Timeline + playable asset, that transition into "idle looping state". (My principle is that games should never stay still!) Because Timeline is by nature a linear sequencer, it lacks "state machine" behaviour needed to make a lively UI.
What I want to do is so that the Animator could go on its own with its RuntimeAnimatorController (only works at runtime, unlike the playable-based Timeline), only after Timeline stop holding its hand. And this trigger would be the send off point. So the Animator needs to wait on some empty state so that it doesn't steal animation with the Timeline, then Any state could transition based on the trigger, for example.
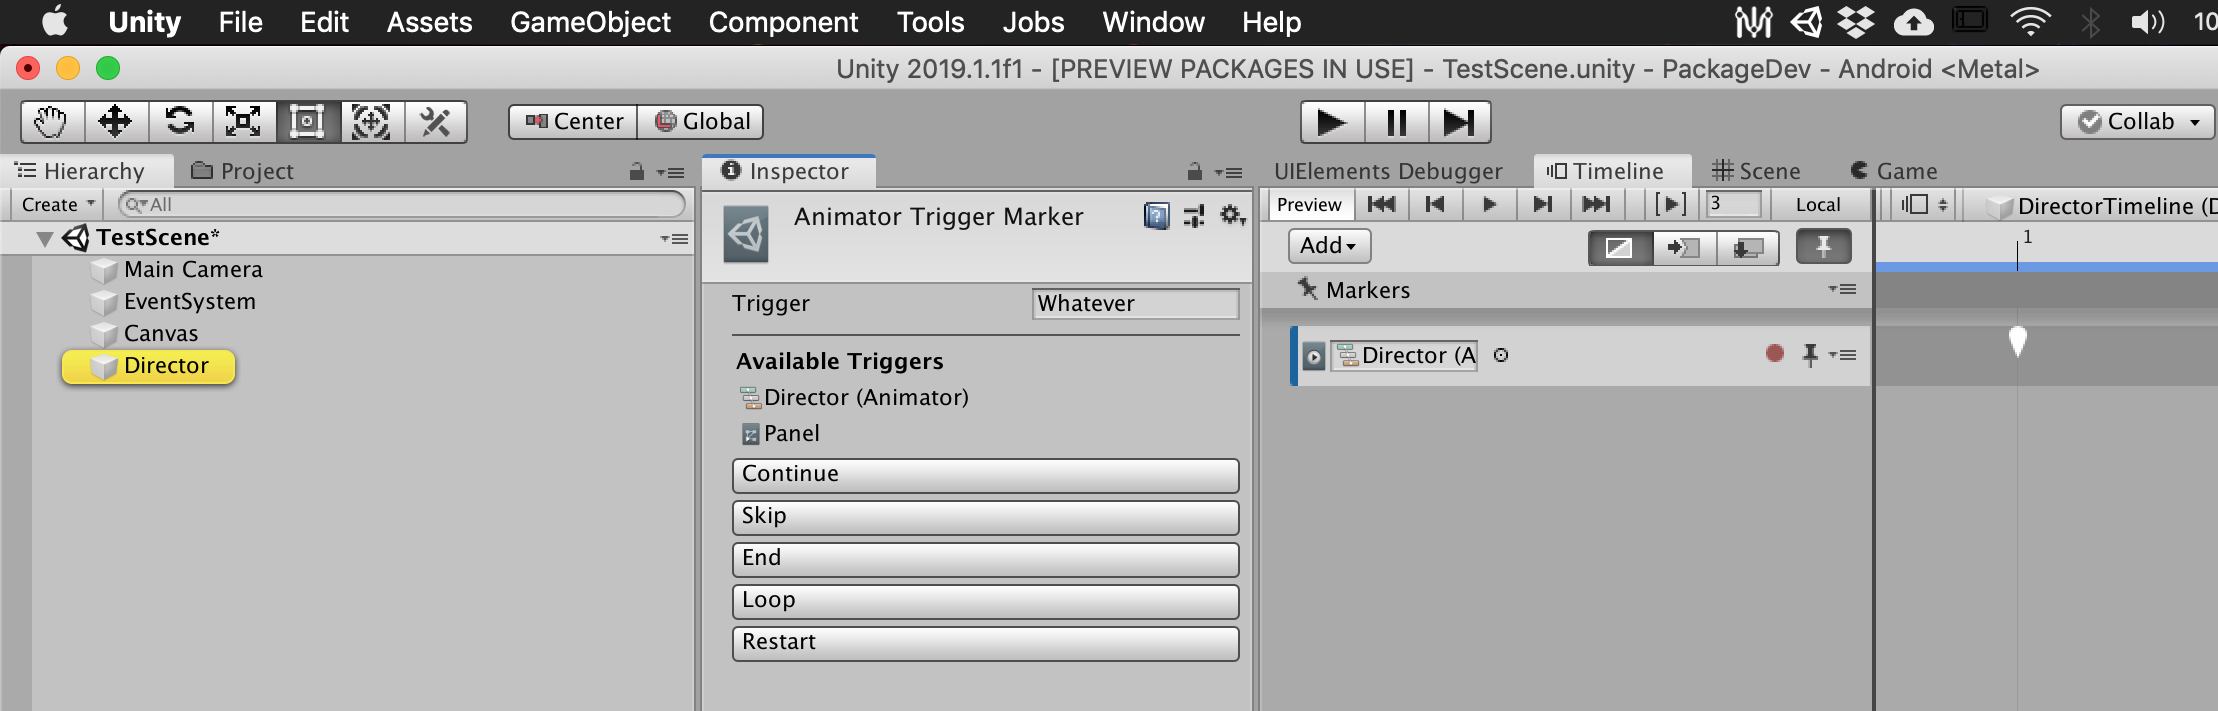
Example use case : these 3 center buttons contains a director. Then an outer director used Control Track to direct them in a waterfall style in conjuction with other UIs on the screen. In edit mode, I could design the intro timings, but after the intro I would like each one to start its own animation. So instead of doing coroutine WaitForSeconds nightmare in the code pre-2019.1, I could put a marker in each one's timeline to start the Animator trigger.
This result is using the finished marker at the end of this article. Each button starts its own state machine that could continue after the timeline's playable are stopped and destroyed. From that trigger, I could then utilize Animator's layer feature (the spin thing is independent of the pulse thing, for example) which is difficult to replicate with a Timeline.
I could achieve the same thing with the general purpose SignalEmitter + SignalAsset that I may name it "TriggerAnimator", then SignalReceiver looking for SignalEmitter with that asset, then in its UnityEvent list call animator.SetTrigger with a string you want.
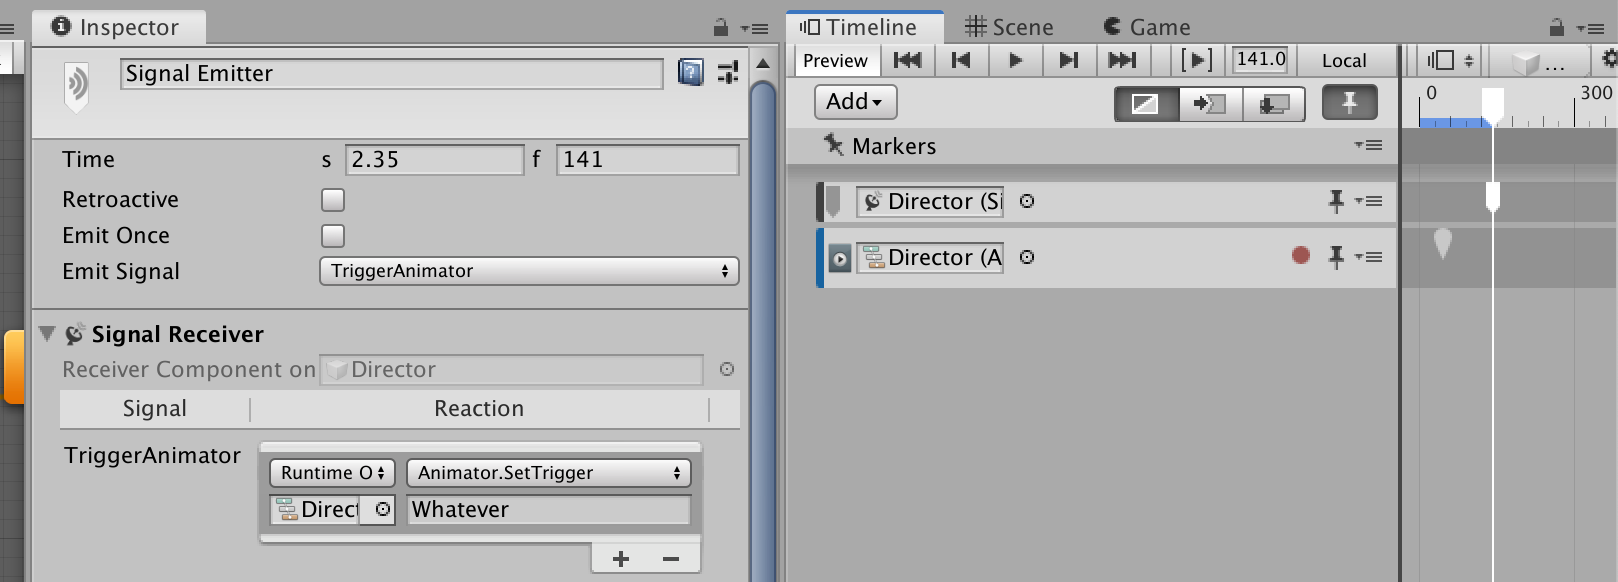
Making an editor tool is usually a good investment in the long run even though an improvement seems small at first. I want to do like the 2nd track, a specialized marker that allows putting the string I want directly serialized in the marker. The string is no longer serialized on the SignalReceiver component.
(This has its cons too, it implies this timeline asset could only be reused with something that could accept that trigger since the string sticks with the timeline asset.)
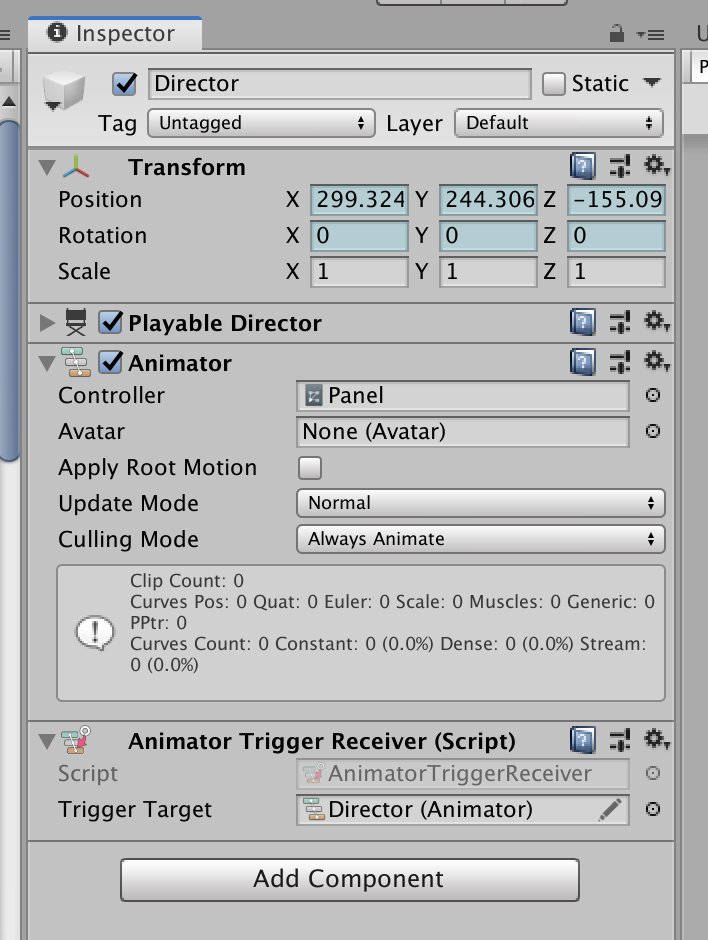
The receiver is the game object with the Animator component, since it is bound on that track. That game object will then broadcasts the marker for all its components. (Read this if you are confused)
But Animator couldn't process the incoming INotification since it is not an INotificationReceiver. I will have an another MonoBehaviour that is also INotificationReceiver called AnimatorTriggerReceiver, that knows the nearby Animator to trigger.
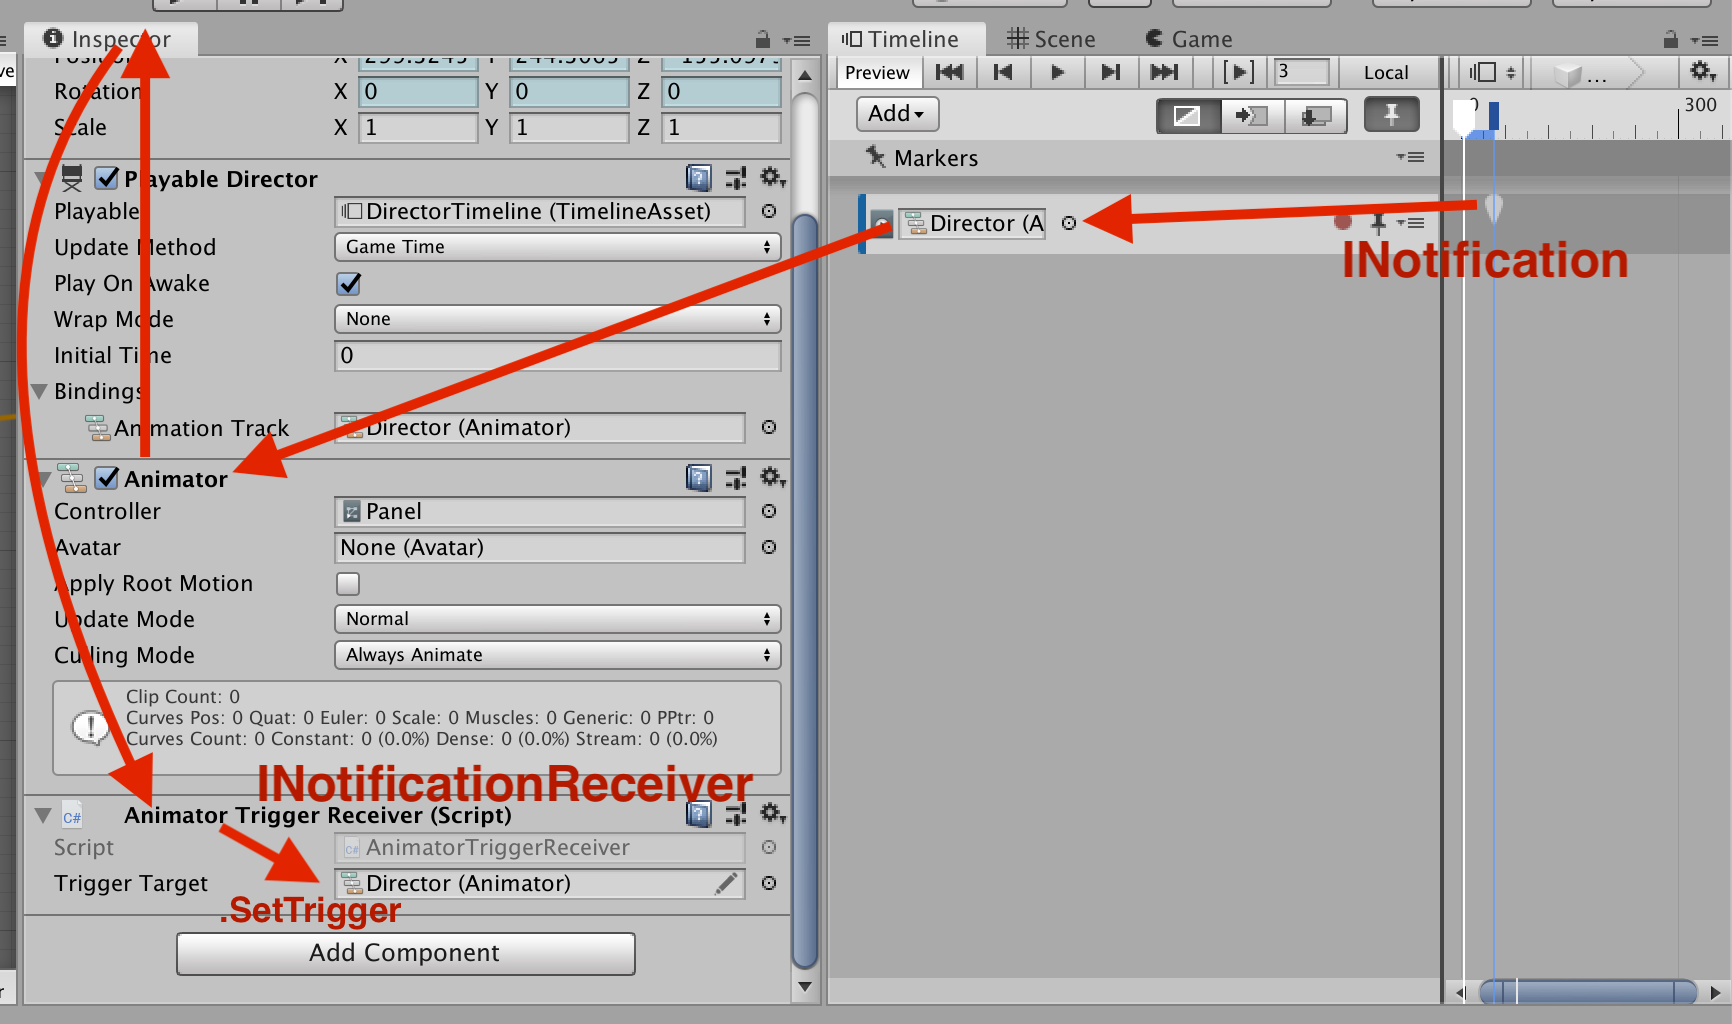
This way the marker only make sense if it is on the Animation Track, where we ensure that the binding is of type Animator (and we know AnimatorTriggerReceiver should be nearby)
The receiver code is easy to understand. But keep in mind it receives all kinds of markers (including built-in SignalEmitter, if it is being broadcasted to this component) so it is important to do pattern matching like this :
using UnityEngine;
using UnityEngine.Playables;

[RequireComponent(typeof(Animator))]
public class AnimatorTriggerReceiver : MonoBehaviour, INotificationReceiver
{
    public Animator triggerTarget;
    public void OnNotify(Playable origin, INotification notification, object context)
    {
        if(notification is AnimatorTriggerMarker atm)
        {
            triggerTarget.SetTrigger(atm.trigger);
        }
    }
}
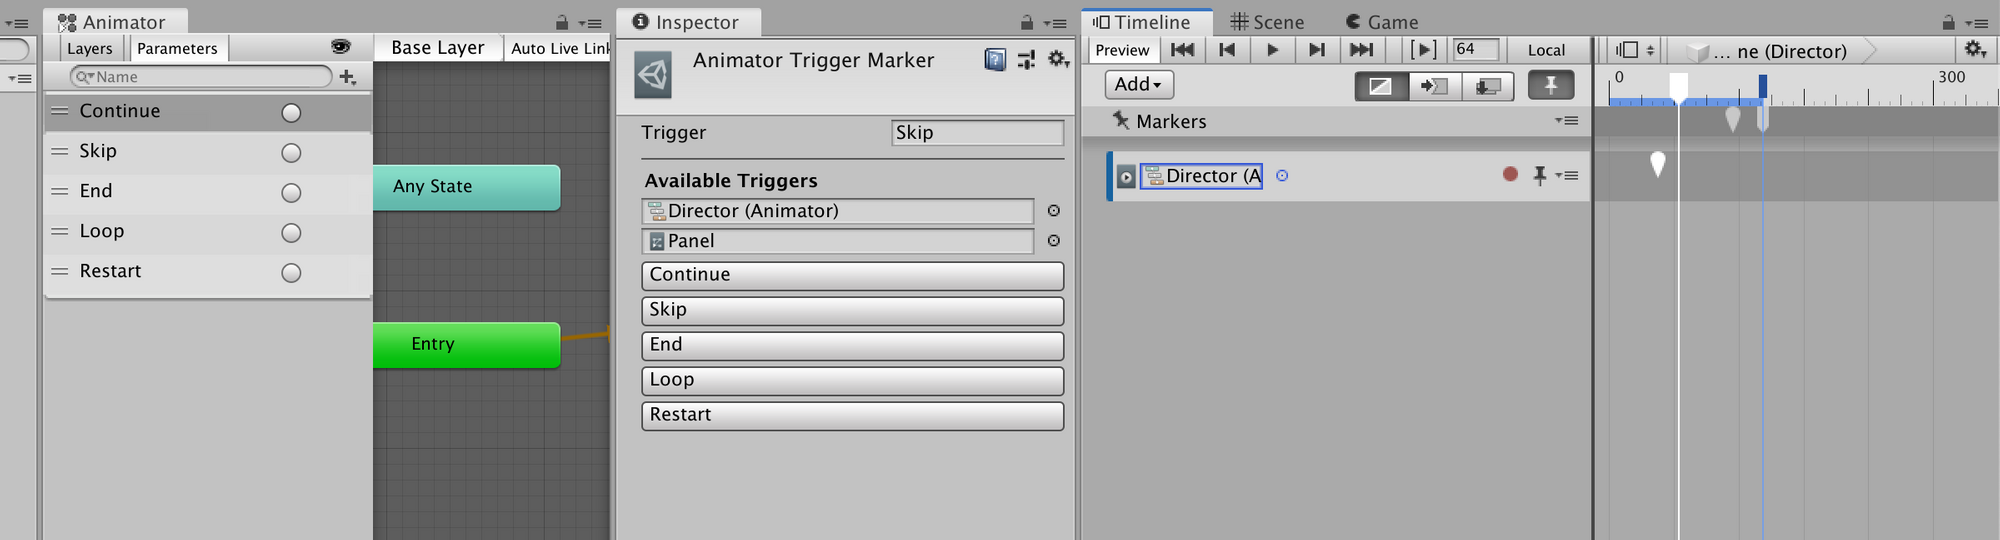
More important, and related to the custom editor we are making : we will use the fact that Animator is available so the marker could pry open the Animator's assigned RuntimeAnimatorController, and retrieve a list of triggers to show for increased usability.
This way even though the marker is just storing a string without any actual link to the RuntimeAnimatorController, at least I know what to type in by looking at the inspector and don't have to switch tab when I forgot what trigger strings are available.
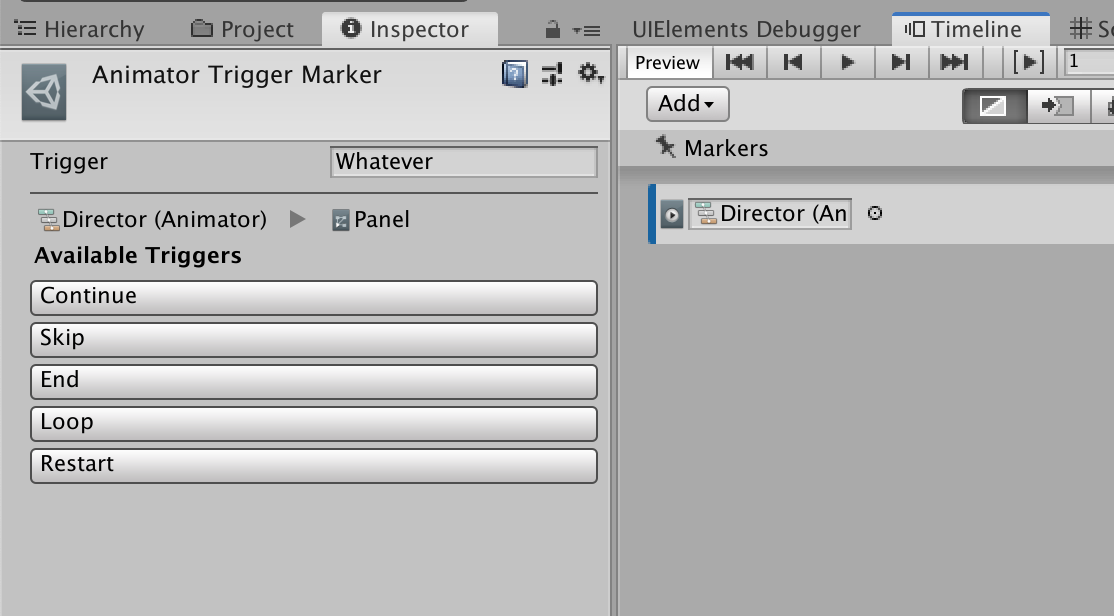
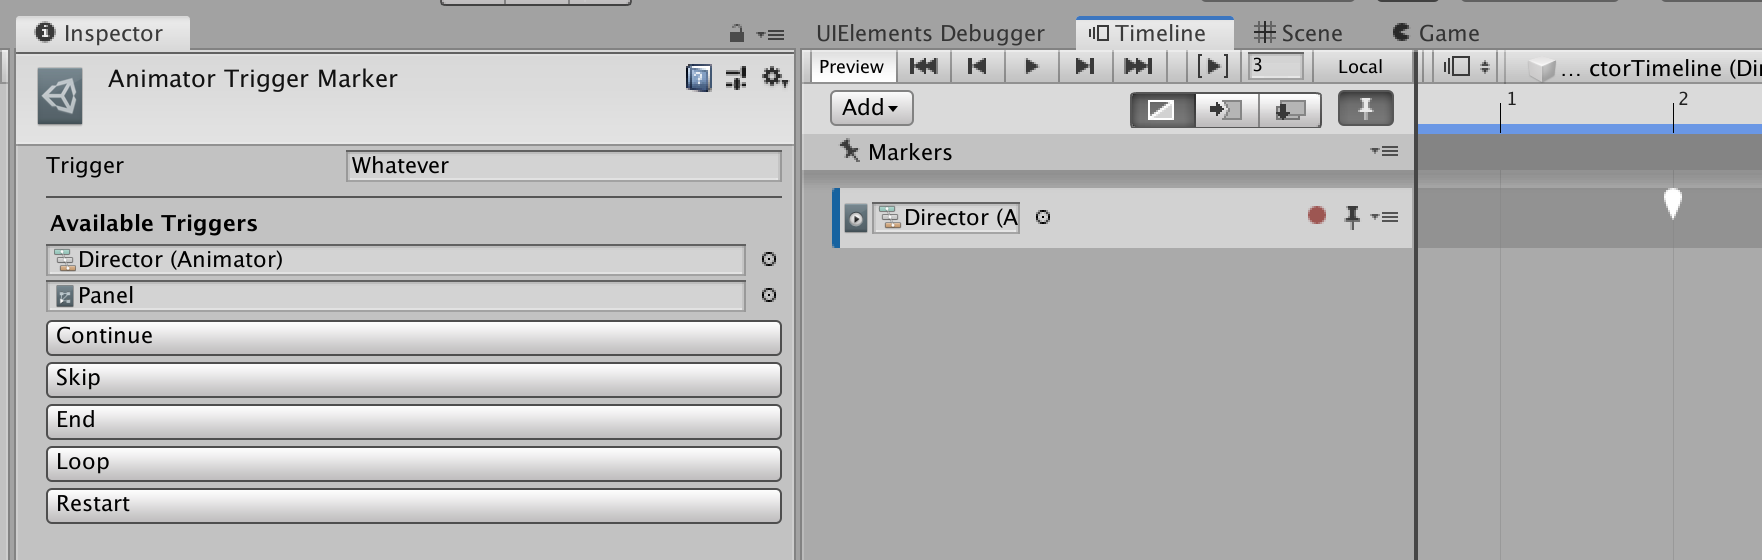
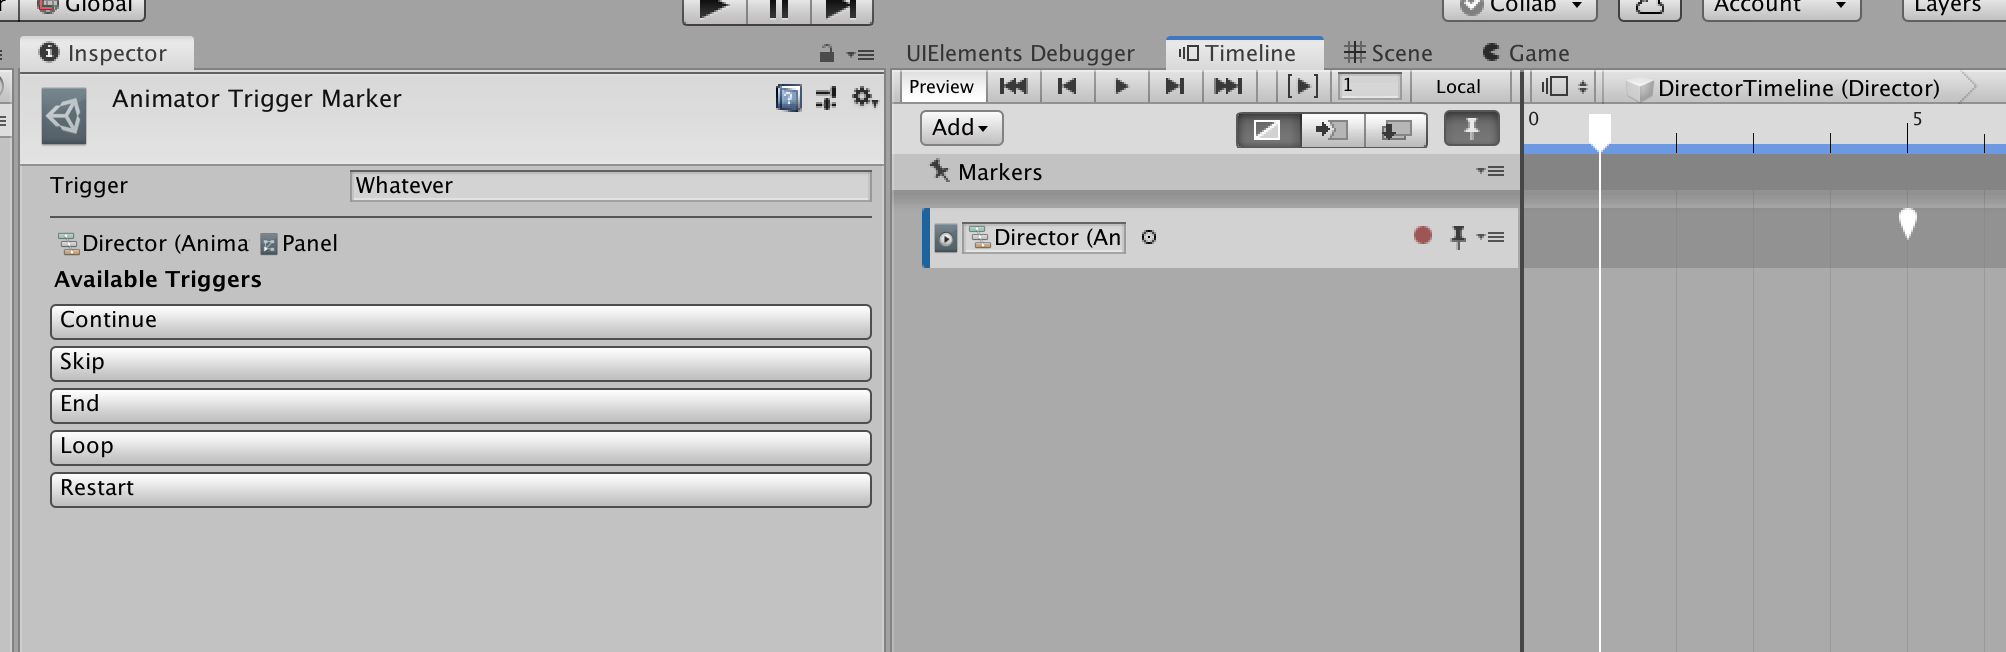
We are going for something like this. (preferrably when I click on those buttons, it should fill in the box for me)
Making the marker
public class AnimatorTriggerMarker : Marker, INotification
{
    [Tooltip("Notify this trigger string to INotificationReceiver (It should be the AnimatorTriggerReceiver) on the same GameObject as the bound Animator.")]
    public string trigger;
    public PropertyName id => trigger.GetHashCode();
}
Just that subclassing make it appears on the right click menu.
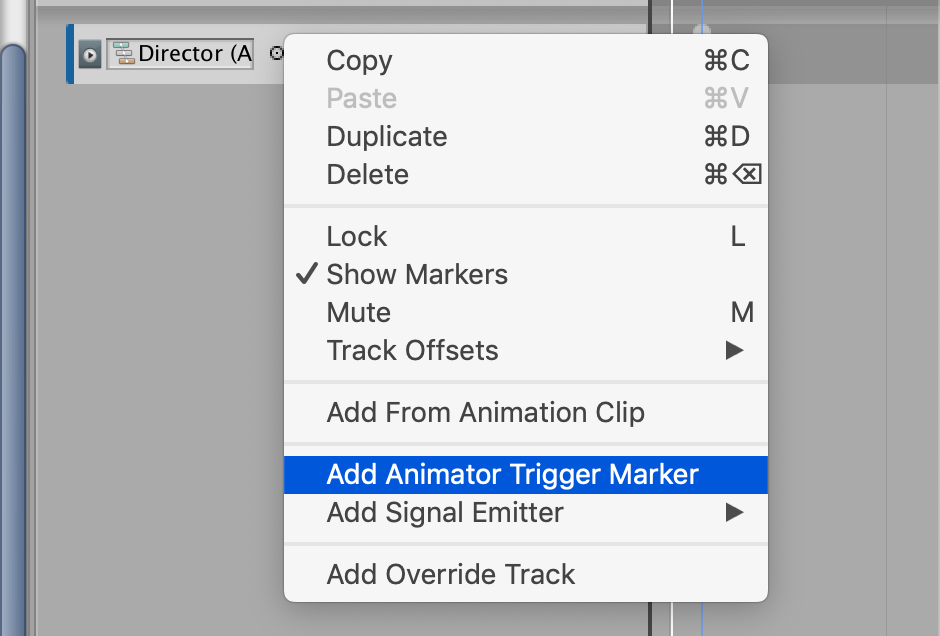
We don't have to make a track for it like when we are making custom timeline/track/clips, since markers could be anywhere, on any tracks.
Believe it or not it is already working with just the marker and the mentioned receiver code, and a correct bound object which could get to the receiver.
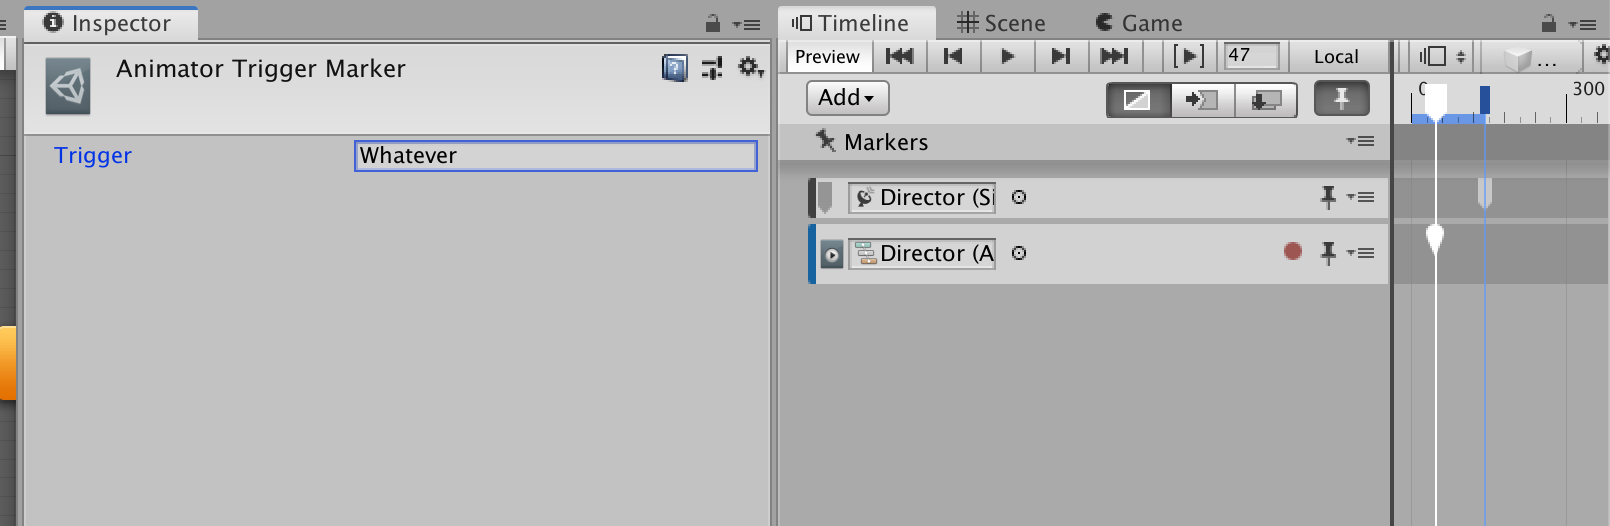
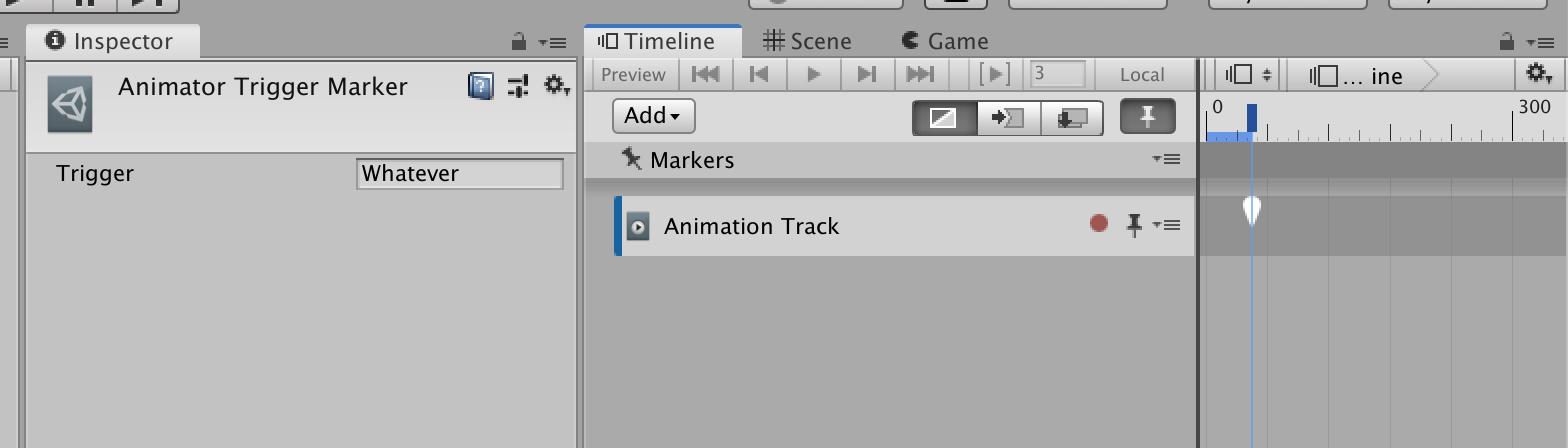
Next let's do something about this sad marker editor.

Opt-in to UIElements and getting back the field
This is how to opt-in to the new VisualElement based editor.
using UnityEditor;
using UnityEditor.Timeline;
using UnityEditor.UIElements;
using UnityEngine;
using UnityEngine.UIElements;

[CustomEditor(typeof(AnimatorTriggerMarker))]
[CanEditMultipleObjects]
public class AnimatorTriggerMarkerDrawer : Editor
{
    public override VisualElement CreateInspectorGUI()
    {
        var vis = new VisualElement();
        return vis;
    }
}
You will now get a blank editor! Recall you used to public override void OnInspectorGUI(); in your Editor code, it's time to say good bye to that.
Next, to get that trigger field back in exactly the same look, UIElements has something called PropertyField. It is an equivalent to IMGUI's PropertyDrawer which draws anything thrown at it if it is a SerializedProperty. Getting to the SerializedProperty is just the good old way.
var vis = new VisualElement();

var prop = serializedObject.FindProperty(nameof(AnimatorTriggerMarker.trigger));
var pf = new PropertyField(prop);
//[ToolTip] is not included in the FindProperty, we need to do it mannually here.
pf.tooltip = "Notify this trigger string to INotificationReceiver (It should be the AnimatorTriggerReceiver) on the same GameObject as the bound Animator.";
vis.Add(pf);

return vis;
Notice the .Add without caring about position. UIElements works like front end web dev that everything stacks vertically by default, depending on its own size. It's like we are always on EditorGUILayout mode, but now don't even have to care about Rect! Just continue .Adding something to the root and they are stacked onto all previous elements. You could reorder them easily later too.
Now you should be back to the normal editor. (But on UIElements)
Let's draw something more below.
Retrieving "scene things" from marker's drawer
Our requirement is that the marker wants to know the Animator's RuntimeAnimatorController to list all the markers. And that Animator is the bound object of the track that the marker is on currently, which is a "scene thing".
Marker is an IMarker and with its TrackAsset parent property, you are just a step away from the bound Animator, or so you might thought.
If you understand how PlayableAsset works (if not), it is impossible to get to the bound Animator via the marker! Even though you see it right before your eye, why couldn't we?
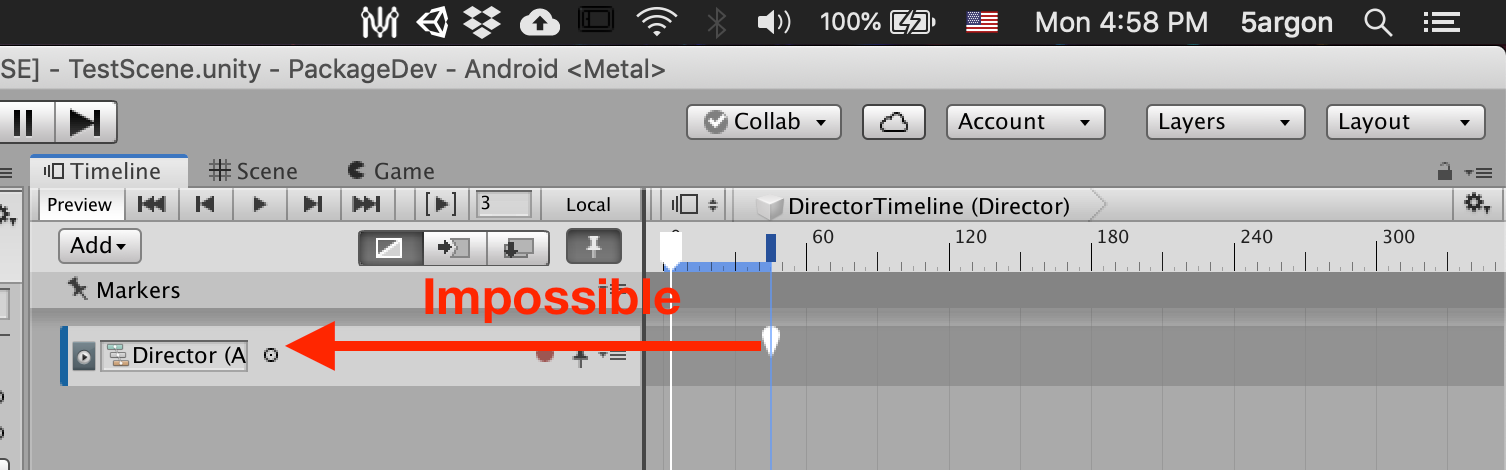
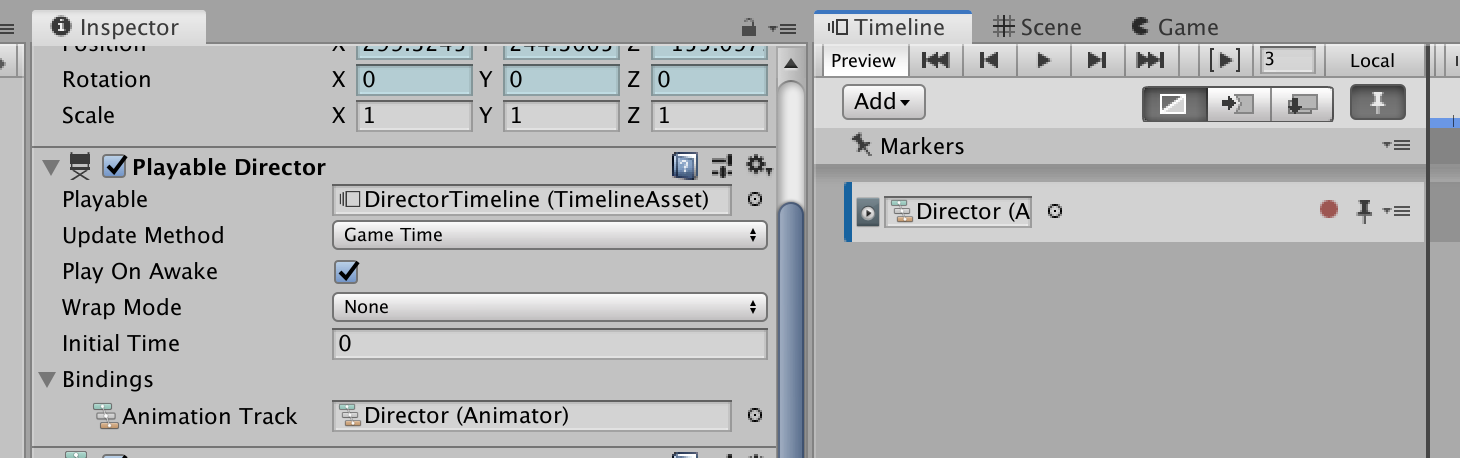
Actually that is just an illusion. Because you are inspecting PlayableDirector, which holds the true power of binding scene objects to the asset being (the TimelineAsset) the editor is just helping you out by displaying the slot for you.
The real identity of that slot is the "Bindings" drop down you see on the PlayableDirector. It is not something on the track at all.
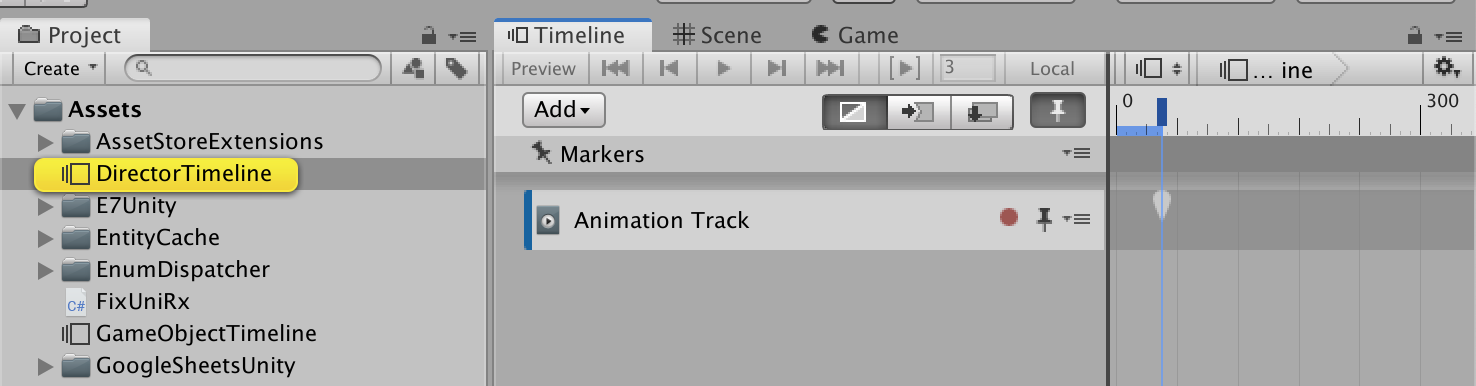
If you click directly on the asset instead of clicking the PlayableDirector, this is the reality of PlayableAsset which in turn contains your marker. Sure, the marker could get back to its track via parent but that's it. No Animator!
So, let's define our custom marker editor once more. The additional editor we are drawing is actually based on currently being inspected PlayableDirector. (Which could give a different bound Animator if multiple PlayableDirector are using the same TimelineAsset)
In the editor code, we need to detect that if we are not inspecting anything, the editor should remain at that primary state with just the string field. This is the complete editor in the case that we are inspecting the TimelineAsset directly from the project tab. Without PlayableDirector, this is all we could draw. Notice that there is no slot on the Animation Track.
TimelineEditor.inspectedEditor
Fortunately this static property make it easy to do the gymnastic. In the AnimatorTriggerMarker, I could write a helper method like this :
[CustomEditor(typeof(AnimatorTriggerMarker))]
[CanEditMultipleObjects]
public class AnimatorTriggerMarkerDrawer : Editor
{
    private Animator GetBoundAnimator()
    {
        //Marker could get to its track, but a track couldn't get to its bound object.
        //The bound object actually is a function of PlayableDirector (even though you see the slot on the track, that's just for your convenience)
        //So we need to get the director that is "previewing" the timeline right now, that is the inspected director.
        //Then use the track asset as a key to get the correct binding.
        if(target is AnimatorTriggerMarker atm && TimelineEditor.inspectedDirector != null)
        {
            if(TimelineEditor.inspectedDirector.GetGenericBinding(atm.parent) is Animator ani)
            {
                ani.Rebind(); //Somehow the trigger list returns 0 elements if we touch them until domain reload, if not forcing rebind.
                return ani;
            }
        }
        return null;
    }

    ...
Visually :
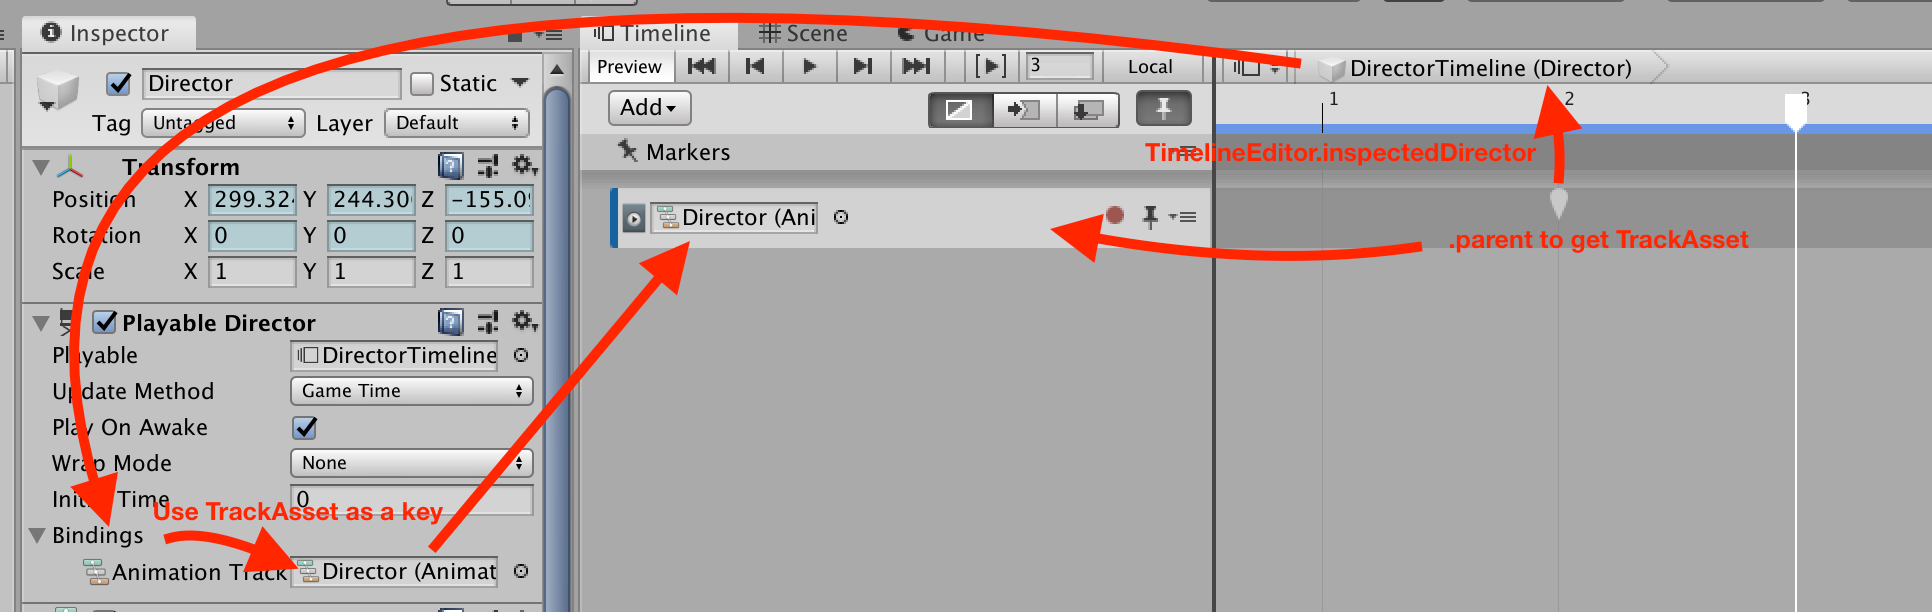
GetGenericBinding requires a key, and that key is fortunately the TrackAsset, right here in the TrackAsset parent property offered by IMarker interface of the marker we are drawing. Throw that in to get the bound Animator.
If it is not null, let's get all the triggers from that with LINQ. If you are one of the anti-LINQer, because this is retained mode UI it is called only once not repeatedly like IMGUI. Even if it is expensive it should not be a problem.
Animator animator = GetBoundAnimator();
if (animator != null)
{
    var availableTriggers = animator.parameters.Where(x => x.type == AnimatorControllerParameterType.Trigger).Select(x => x.name).ToList();
    if (availableTriggers.Count > 0)
    {
        ...
    }
}
Designing with UIElements
Is easy! Just .Add one after another and we are done. In this article we will not touch UXML and UCSS yet, it is completely code-based UIElements.
if (availableTriggers.Count > 0)
{
    var box = new Box();
    box.style.height = 1;
    box.style.marginTop = 5;
    box.style.marginBottom = 5;
    vis.Add(box);

    var label = new Label("Available Triggers");
    label.style.unityFontStyleAndWeight = FontStyle.Bold;
    vis.Add(label);

    var animatorPreview = new ObjectField { objectType = typeof(Animator) };
    var rac = new ObjectField { objectType = typeof(RuntimeAnimatorController) };
    animatorPreview.SetValueWithoutNotify(animator);
    rac.SetValueWithoutNotify(animator.runtimeAnimatorController);

    vis.Add(animatorPreview);
    vis.Add(rac);

    foreach (string trigger in availableTriggers)
    {
        Button btn = new Button(() =>
        {
            prop.stringValue = trigger;
            serializedObject.ApplyModifiedProperties();
            //Debug.Log($"Pushed the button {trigger}");
        })
        { text = trigger };

        btn.style.unityTextAlign = TextAnchor.MiddleLeft;
        vis.Add(btn);
    }
}
Built-in elements used :
ObjectField: make that box with the icon and the dot picker on the right. I want to show whichAnimatorand whichRuntimeAnimatorControlleris being extracted the triggers to show.Button: I want each one of these to represent each trigger. I would like the push to put the string in thetriggertop field for me in the end. It is a simple set to theSerializedPropertyand call apply on theSerializedObject, which we capture both in theButton's lambda and it is perfectly usable.Box: I use this just to draw a servicable line instead of a box.
We get this :
Pushing the button already works. But next I think it is stupid that the ObjectField could be focused (which is fine) but also could be pressed ESC to empty the slot. Even though this slot is not actually bind to any actual property and is just for display, I would like to make it looks a bit better "for-display".
What if we use SetEnabled :
var animatorPreview = new ObjectField { objectType = typeof(Animator) };
var rac = new ObjectField { objectType = typeof(RuntimeAnimatorController) };

animatorPreview.SetValueWithoutNotify(animator);
rac.SetValueWithoutNotify(animator.runtimeAnimatorController);

animatorPreview.SetEnabled(false);
rac.SetEnabled(false);
Kinda better, but then my OCD says I don't want it being greyed out because it is hard to read and ugly. Ideally I want just the icon and the label, without the "dropwell" box and the right dot... also being disabled means we couldn't click to ping it. (minor problem)
Custom VisualElement
So I am thinking of making a new VisualElement from ObjectField called ReadOnlyObjectField, which instead of having to typeof and SetValueWithoutNotify I want to do them all at the constructor like this :
var animatorPreview = new ReadOnlyObjectField<Animator>(animator);
var rac = new ReadOnlyObjectField<RuntimeAnimatorController>(animator.runtimeAnimatorController);

vis.Add(animatorPreview);
vis.Add(rac);
The class code right now which make the same thing as before :
/// <summary>
/// Removed background image and the selection dot on the right from object field.
/// </summary>
private class ReadOnlyObjectField<T> : ObjectField where T : UnityEngine.Object
{
    public ReadOnlyObjectField(T obj) : base()
    {
        SetValueWithoutNotify(obj);
        this.SetEnabled(false);
    }
}
Right, now let's settle the OCD. So I want to modify how the Unity's default drawer looks.
Modifying the default VisualElement tree
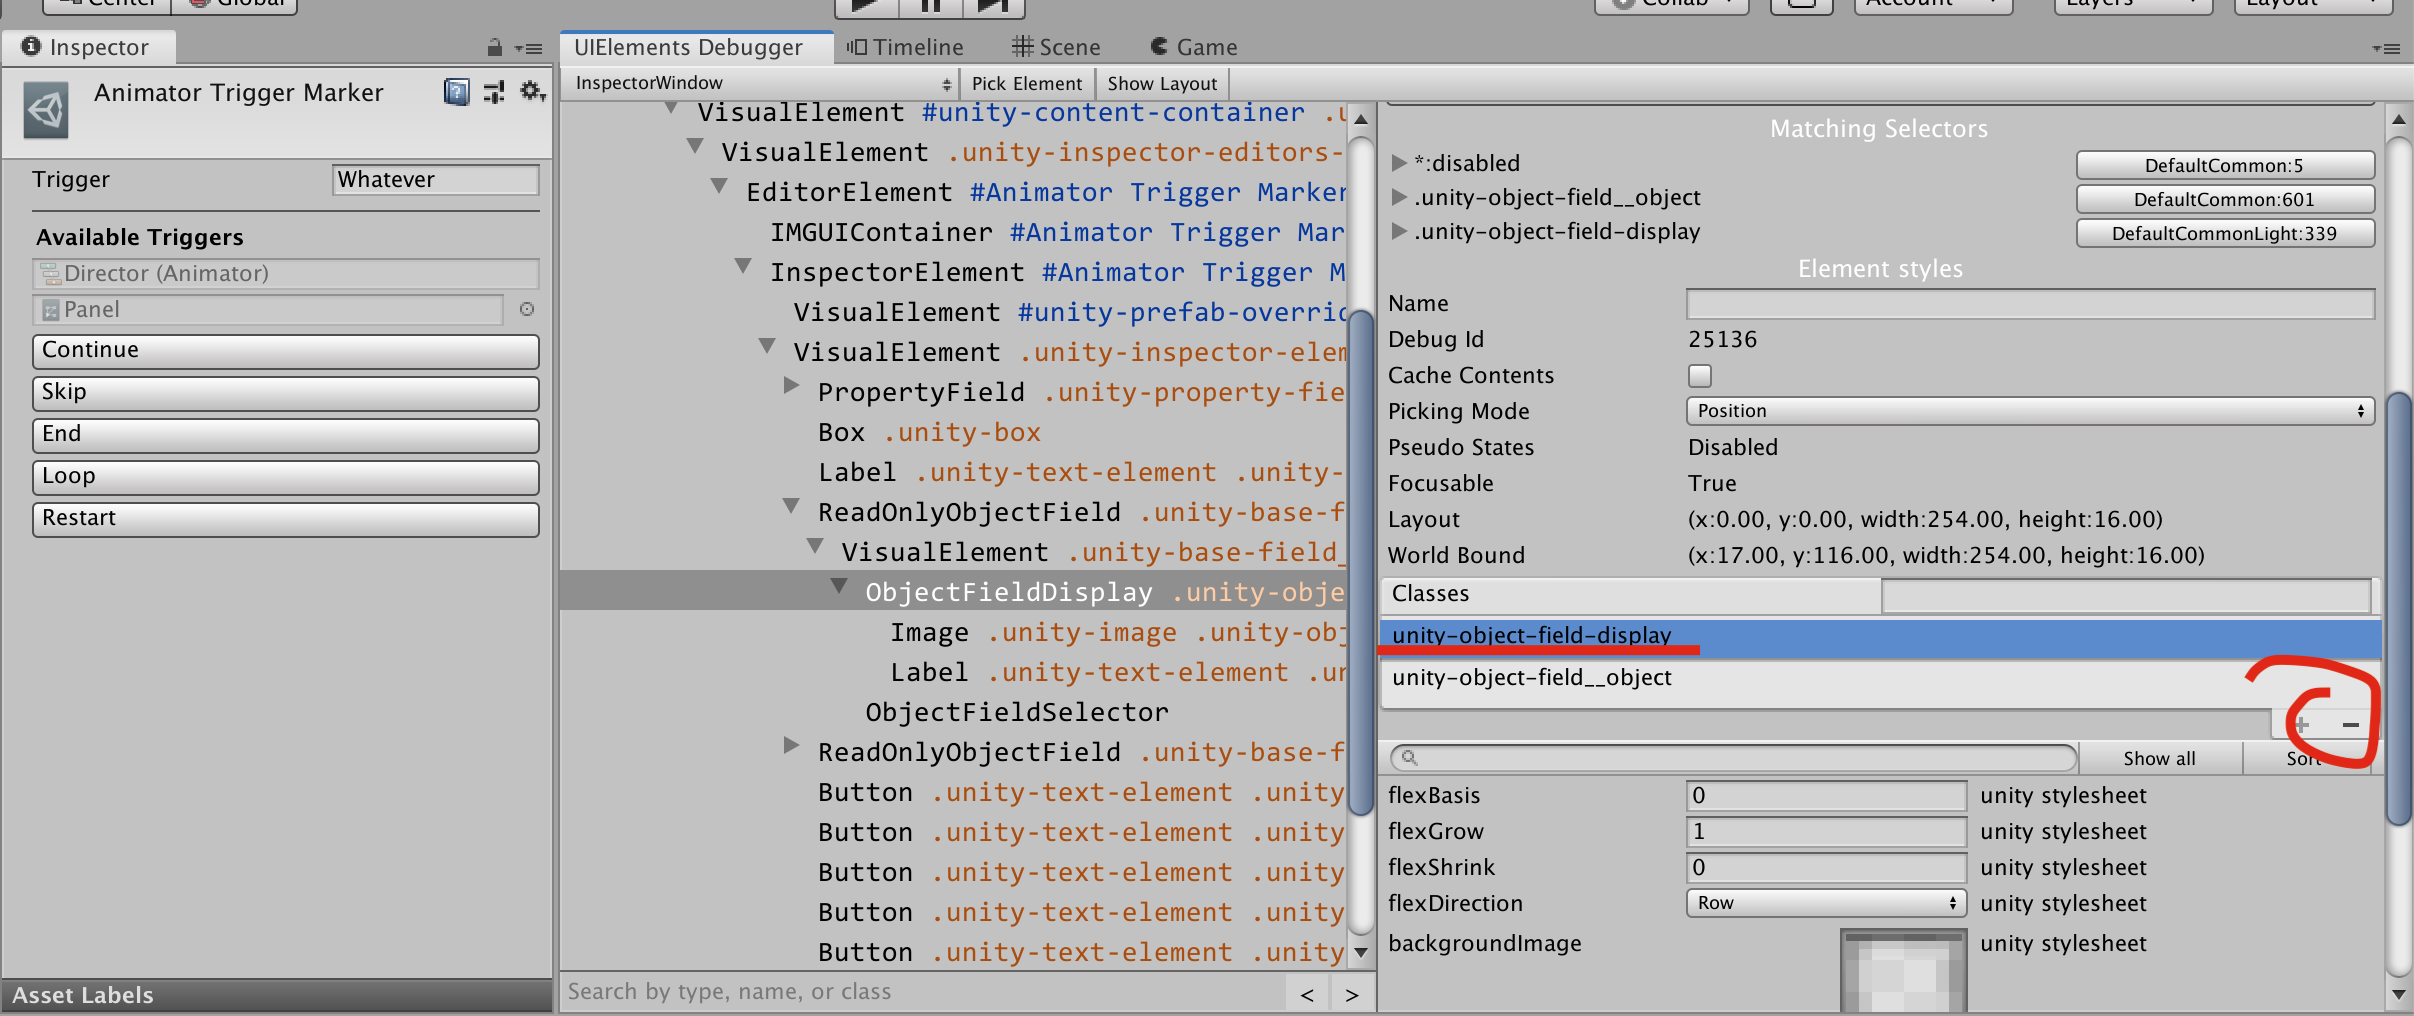
Unity team said that currently you must use the debugger to inspect the default style and modify them on the fly. Right click on the top tab and open the inspector. WE FRONT END NOW BOYS.
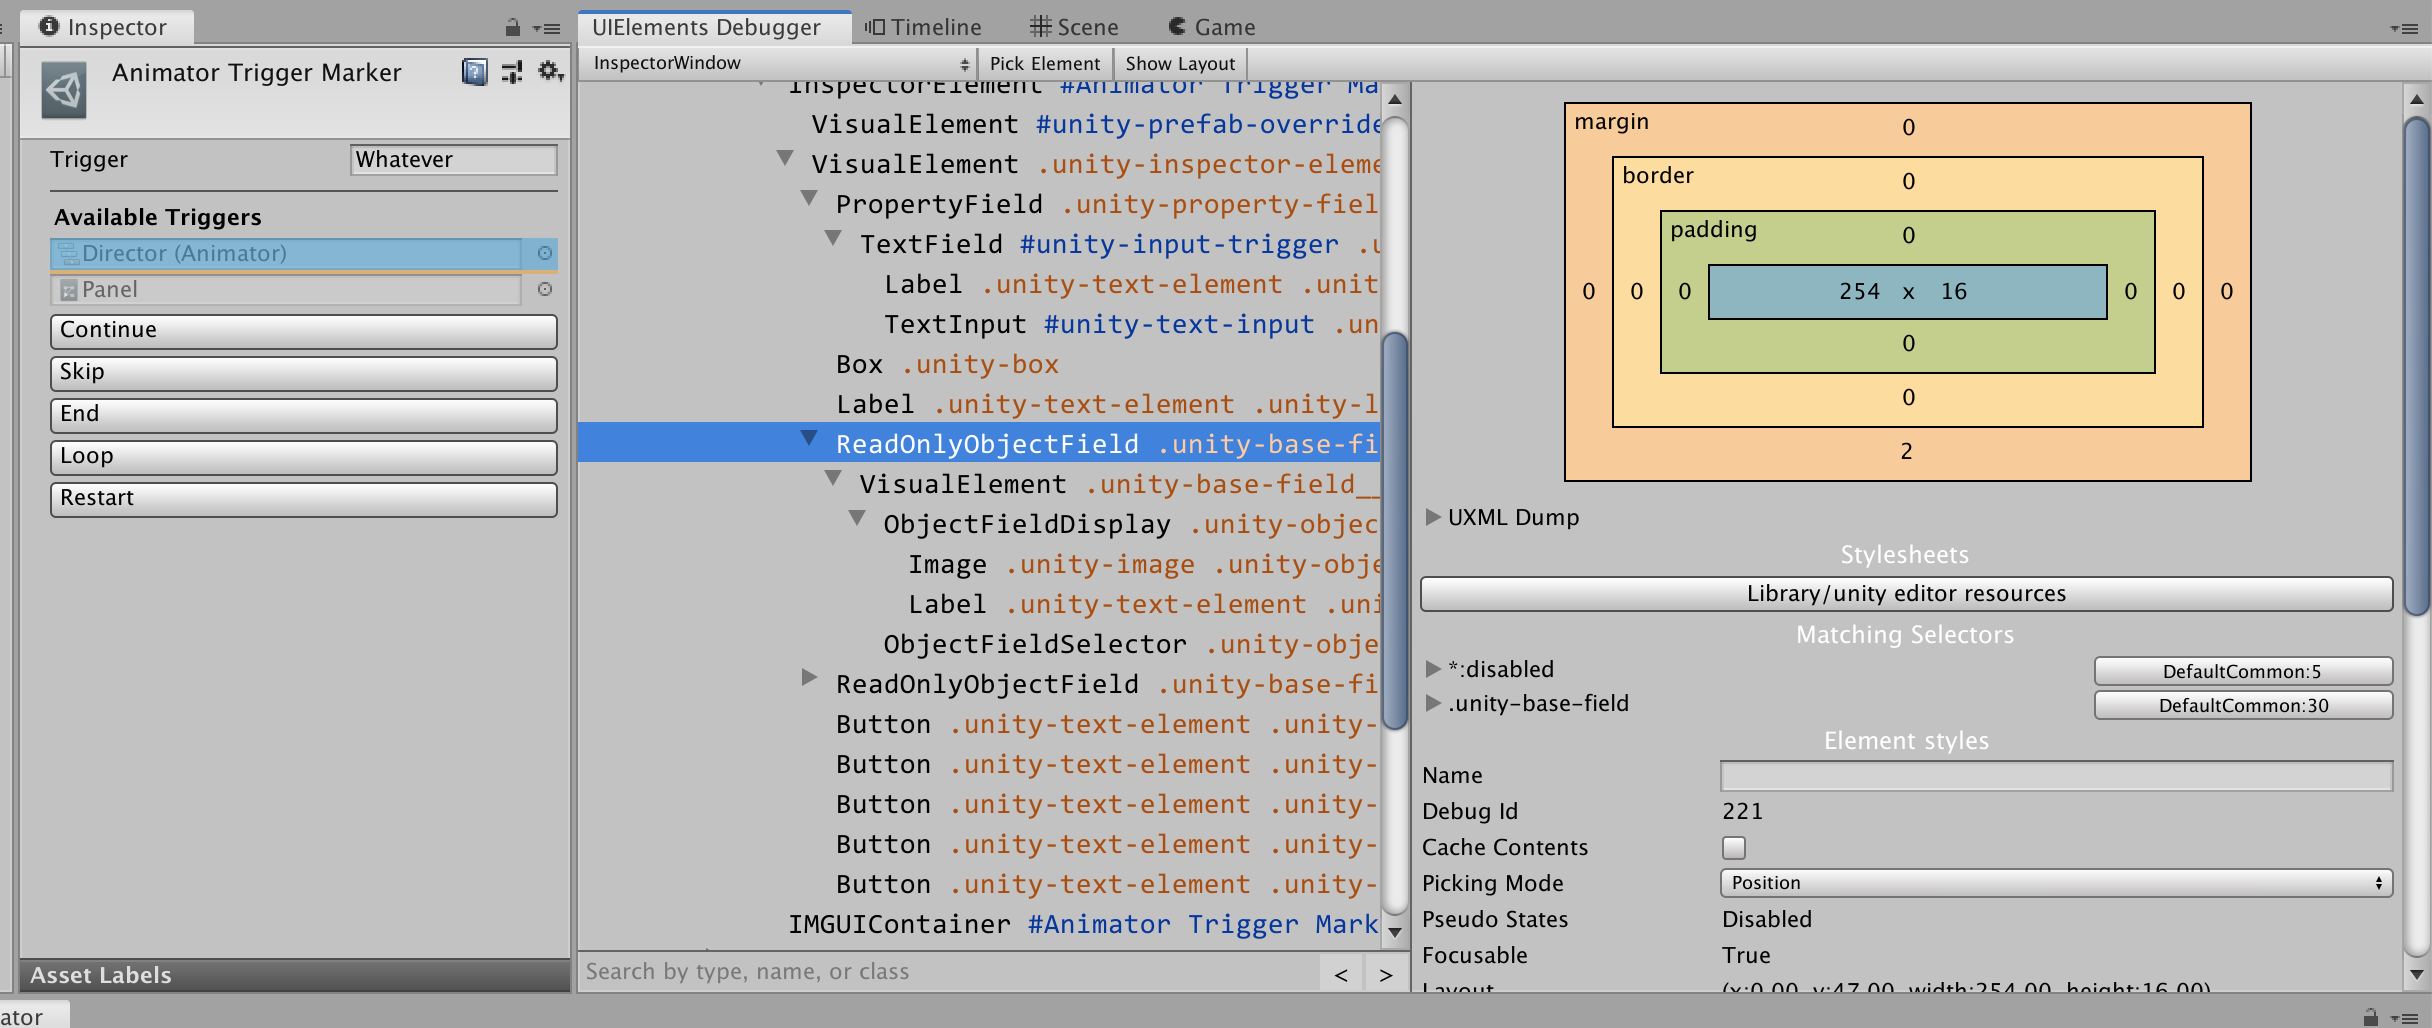
In here I could prototype my changes. I noticed that :
- By removing the class from
ObjectFieldSelectorinside which represents the dot, it disappears. Indicating that the dot appears based on class matching, not actually whatObjectFieldSelectordraw by itself.
2. By also removing a certain class from ObjectFieldDisplay, I could make the box disappear too.
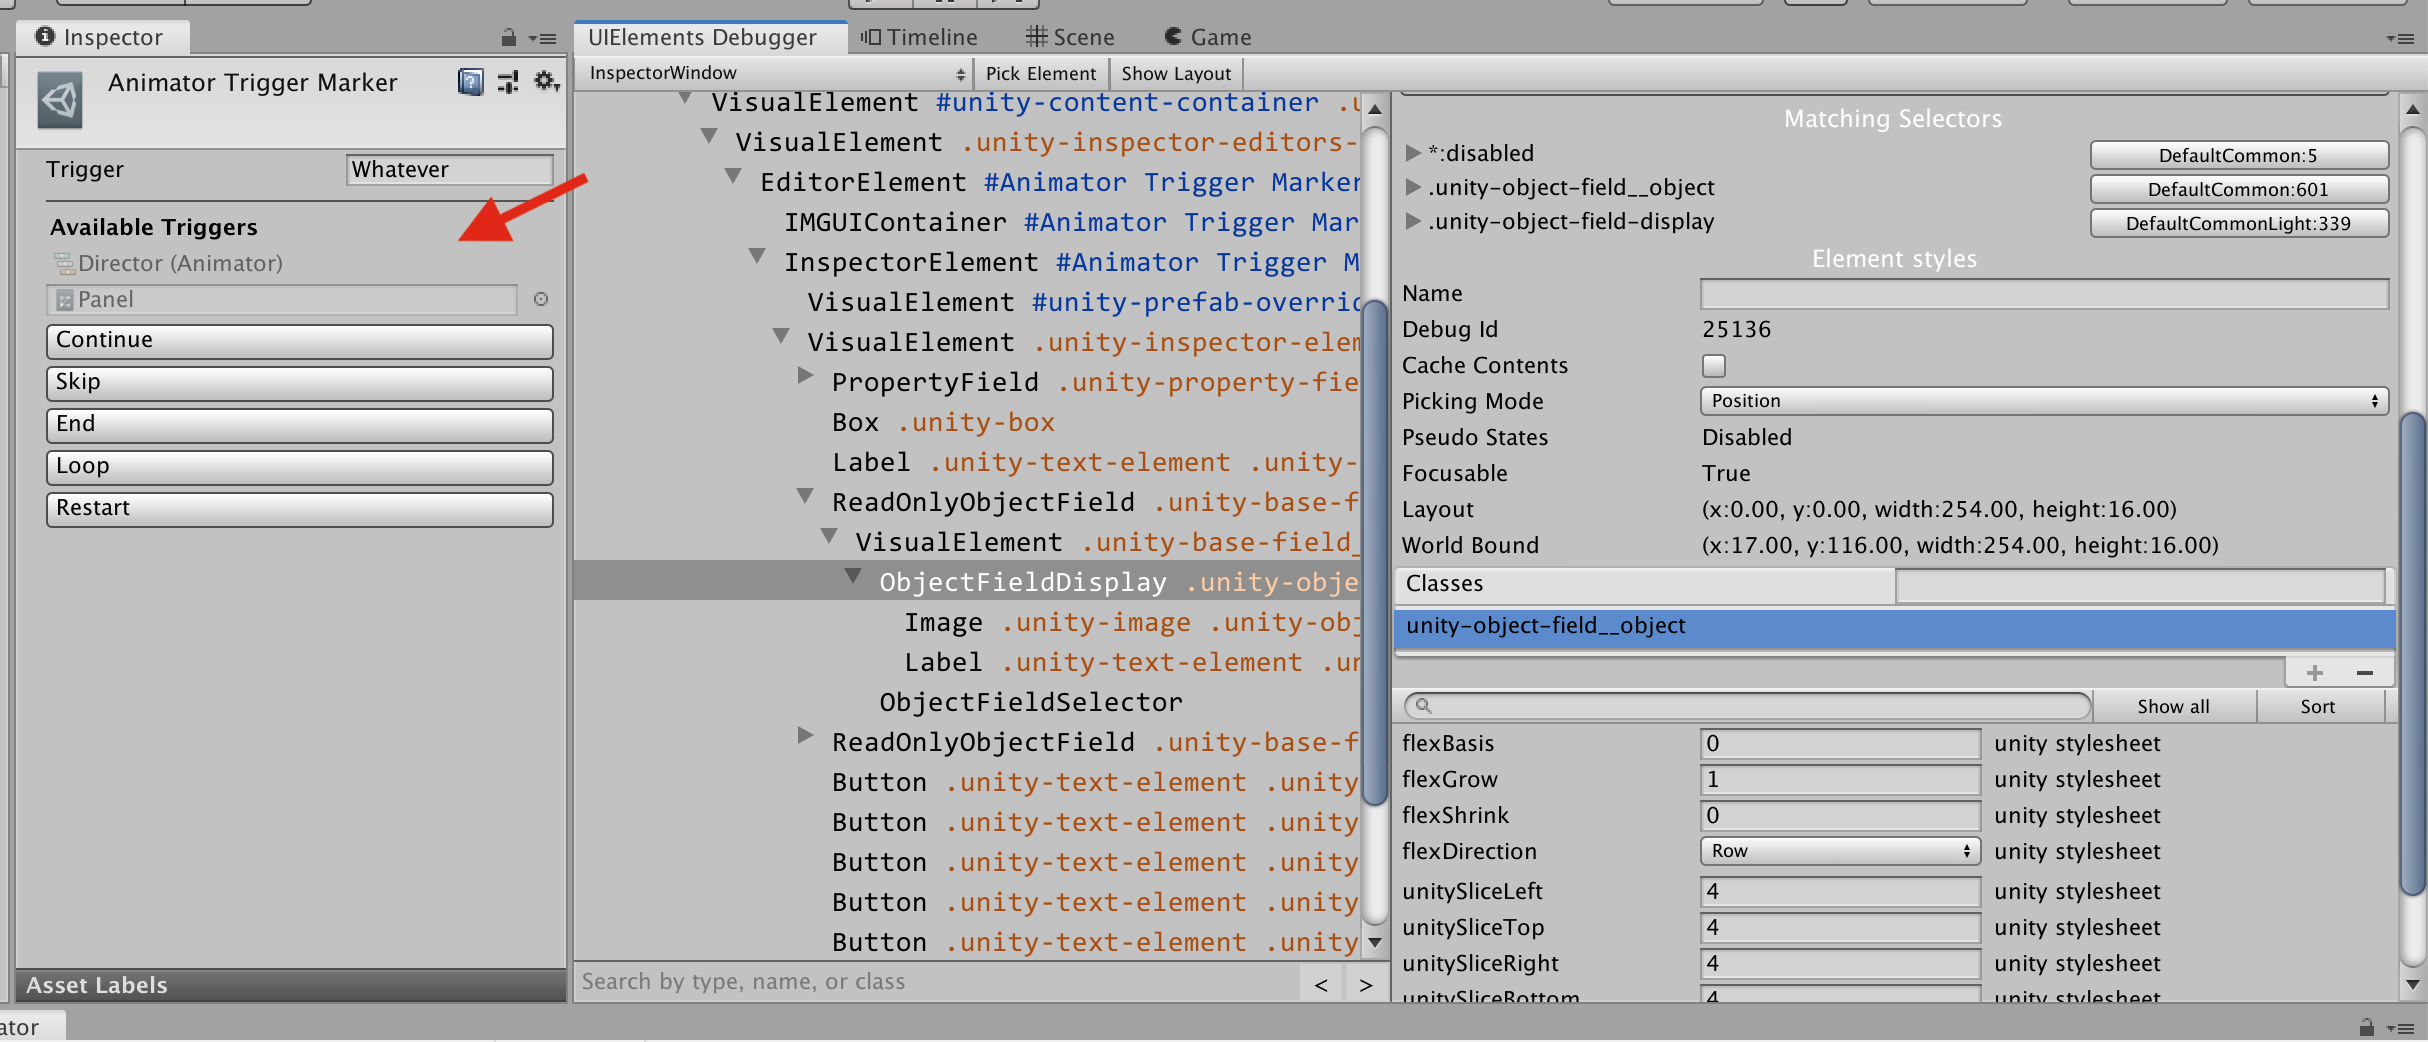
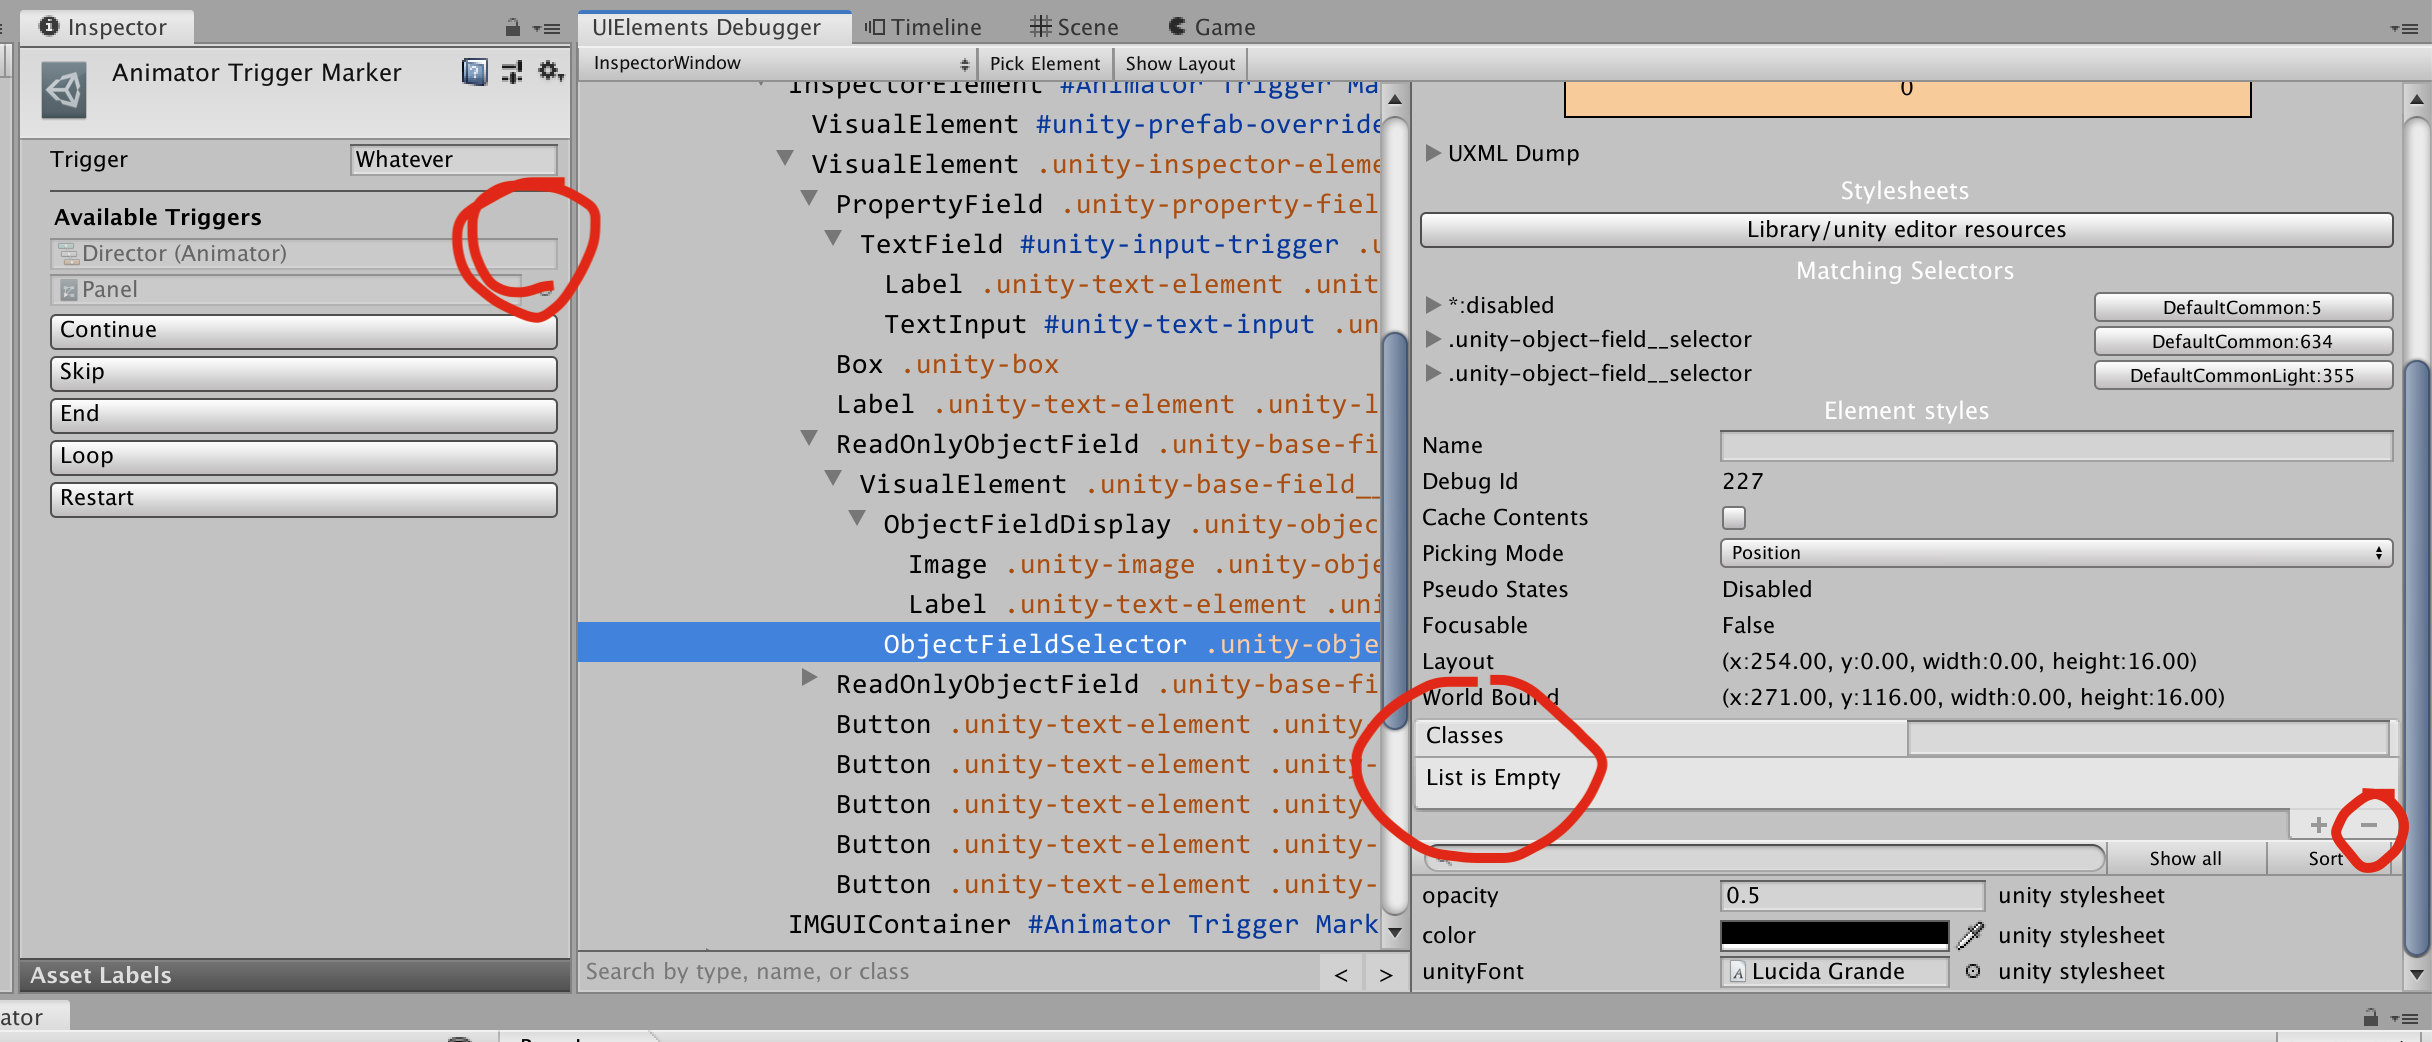
Let's try to do this in the code. I found that ObjectFieldDisplay and ObjectFieldSelector that I want is an internal type, and I couldn't use that with the query.
Instead, I choose to do class-based search (CSS "class", instead of Type, which in C# unfortunately called class). In the tree I know there is only one element with respective class. I use .Q UQuery method that returns the first match. (Use .Query instead if you want to work on multiple matches)
After returning the result, I ask them to remove the class which I just used to search. I will remove the SetEnabled too because I don't want it greyed out anymore.
/// <summary>
/// Removed background image and the selection dot on the right from object field.
/// </summary>
private class ReadOnlyObjectField<T> : ObjectField where T : UnityEngine.Object
{
    public ReadOnlyObjectField(T obj) : base()
    {
        SetValueWithoutNotify(obj);
        this.Q(name: null, className: "unity-object-field__selector").RemoveFromClassList("unity-object-field__selector");
        this.Q(name: null, className: "unity-object-field-display").RemoveFromClassList("unity-object-field-display");
    }
}
Looks great! Also it is still possible to click on them and ping the original object, just that it didn't turn blue anymore because the class I removed was handling the Hover and Focus "pseudo states". But I can live without that.
Using the flex box
I have an another idea, how about moving that 2 ReadOnlyObjectField over the "Available Triggers" text, then arrange them horizontally like this : -icon- Director (Animator) > -icon- Panel.
Moving them up is as simple as rearraging your .Add. Adding a horizontally arranged box is also as easy as adding nested VisualElement which has a flex box style with horizontal layout. Consult this document about how to work with Facebook's Yoga layout engine used in the UIElements layout system.
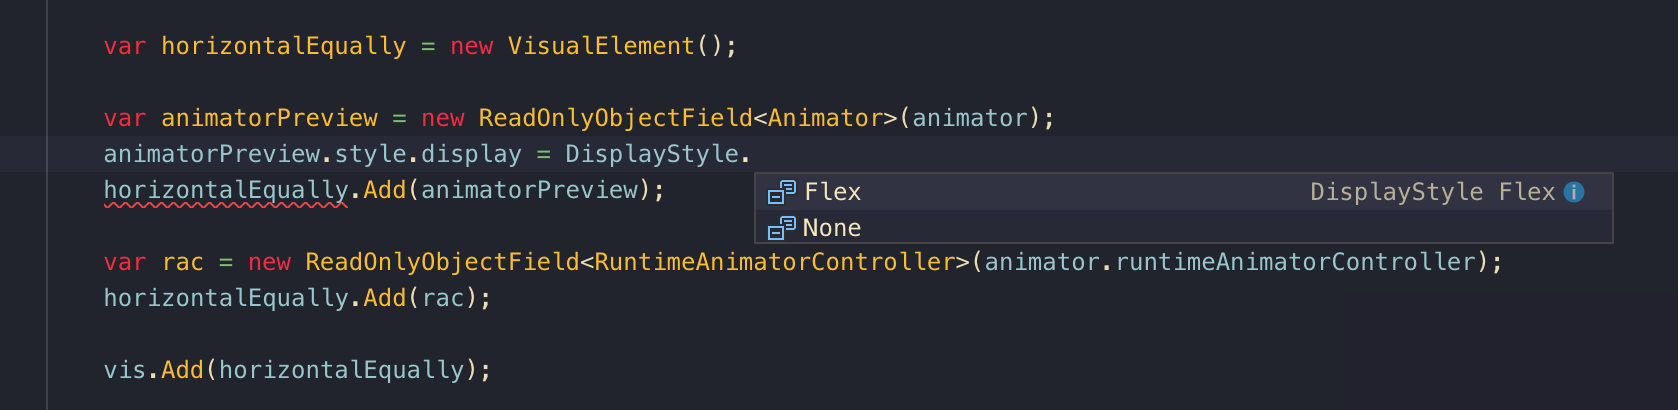
If you are coming from front-end web development, you might be thinking, about about just use something like display: inline-block and let those 2 things sit next to each other in a wrapped VisualElement instead of vertically? Unfortunately, Unity gives you only 2 display mode of either flex or none. Too bad!
For our requirement, the task is to :
- Make a new
VisualElementwithstyle.flexDirection = FlexDirection.Rowfor horizontal arrangement. - Put out two things inside that.
- The two things must have a
widthdefined, because the original width was set to stretch fill. - Finally add our new
VisualElementto the topVisualElement.
For example :
var horizontalEqually = new VisualElement();

var animatorPreview = new ReadOnlyObjectField<Animator>(animator);
animatorPreview.style.width = 100; // <----
horizontalEqually.Add(animatorPreview);

var rac = new ReadOnlyObjectField<RuntimeAnimatorController>(animator.runtimeAnimatorController);
rac.style.width = 100; // <----
horizontalEqually.Add(rac);

horizontalEqually.style.flexDirection = FlexDirection.Row; // <----

vis.Add(horizontalEqually);
Alright, we are almost there. Except that the size 100 is wrong. We have to somehow measure the required width of each element. I don't know any built-in way to do this at the moment, because all Unity things are stretched the entire width mostly I don't know where to copy. (The usual text-and-things like Trigger field above is just a flex with minWidth = 150 on the label on the left, then distribute to get you resolvedStyle width.)
So let's write this anew in our ReadOnlyObjectField.
/// <summary>
/// Removed background image and the selection dot on the right from object field.
/// </summary>
private class ReadOnlyObjectField<T> : ObjectField where T : UnityEngine.Object
{
    public ReadOnlyObjectField(T obj) : base()
    {
        SetValueWithoutNotify(obj);
        this.Q(name: null, className: "unity-object-field__selector").RemoveFromClassList("unity-object-field__selector");
        this.Q(name: null, className: "unity-object-field-display").RemoveFromClassList("unity-object-field-display");
    }

    public float MeasureWidth()
    {
        Image icon = this.Q<Image>();
        Label label = this.Q<Label>();
        string labelText = label.text; //"Director (Animator)"
        return icon.style.maxWidth.value.value + EditorStyles.objectField.CalcSize(new GUIContent(labelText)).x;
    }
}
By inspecting, I know there is only one Image and Label each in the tree. I then try to add up the size of those things.
For the icon, resolvedStyle and style do not have any useful width but we could utilize maxWidth that is preventing the icon to go bigger. The icon could get smaller than this but I don't care, just use the largest width.
For text, we turn to the good old CalcSize usable on GUIStyle. So I get the equivalent style from IMGUI's object field and measure with that.
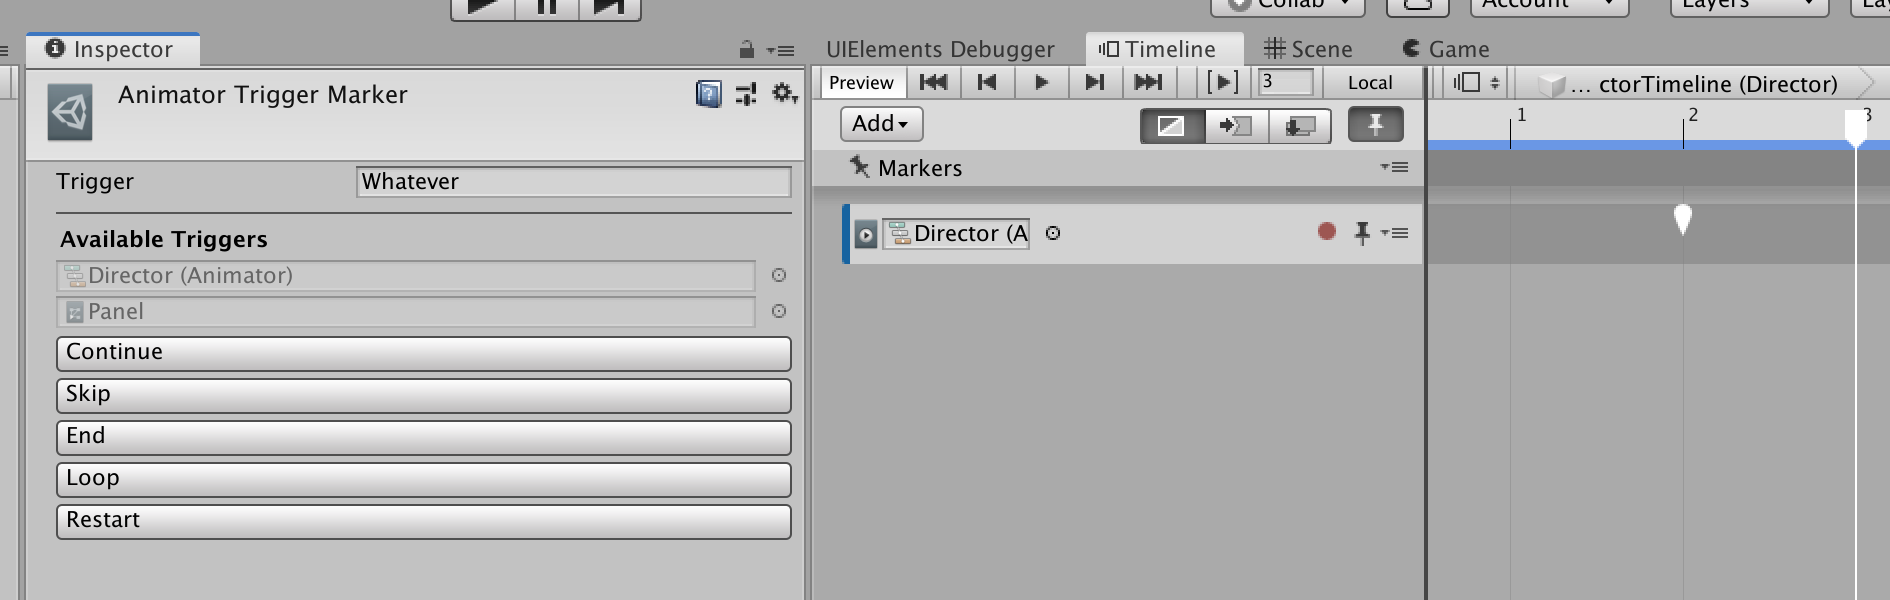
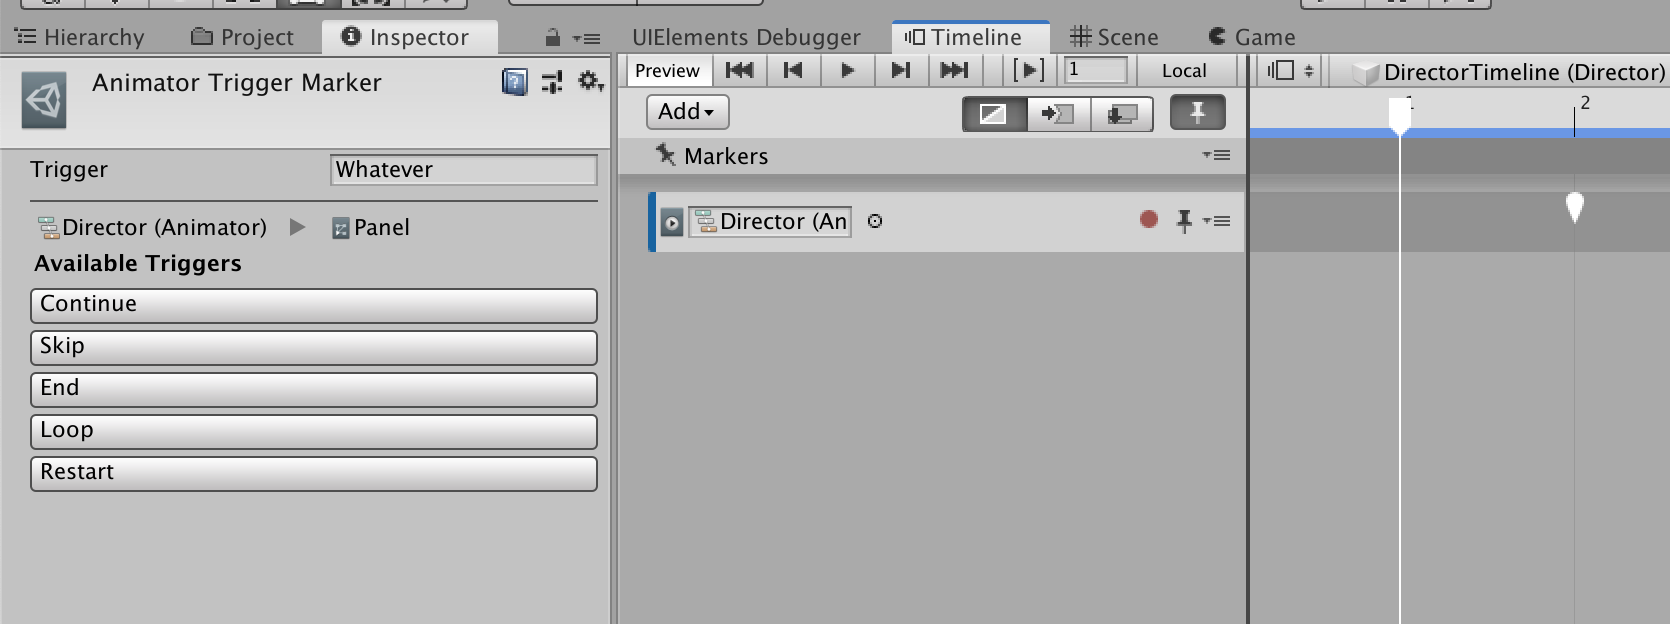
Replace 100 with measurement results we (******* finally) get :

Since we are already on a horizontal flex box, we could put a cherry on top with this design :
var horizontalEqually = new VisualElement();

var animatorPreview = new ReadOnlyObjectField<Animator>(animator);
animatorPreview.style.width = animatorPreview.MeasureWidth();
horizontalEqually.Add(animatorPreview);

// Sandwiched this .Add into the flex box
var arrow = new VisualElement();
arrow.AddToClassList("unity-foldout__toggle");
var arrowInner = new VisualElement();
arrowInner.AddToClassList("unity-toggle__checkmark");
arrow.style.width = 20; //So it works with horizontal flex box
arrow.style.marginLeft = 0; //The selector comes with unwanted margin, we kill that here
arrow.Add(arrowInner);
horizontalEqually.Add(arrow);

var rac = new ReadOnlyObjectField<RuntimeAnimatorController>(animator.runtimeAnimatorController);
rac.style.width = rac.MeasureWidth();
horizontalEqually.Add(rac);

horizontalEqually.style.flexDirection = FlexDirection.Row;

vis.Add(horizontalEqually);
Ooh sexy arrow... you might be wondering what the hell that is. I stole that arrow from Foldout element. I know the exact requirement to get that arrow by try adding new Foldout() to the root VisualElement, then use the inspector to see the class selector that results in the arrow background-image. Here's an example how to copy what would trigger the selector by inspecting on the Foldout.
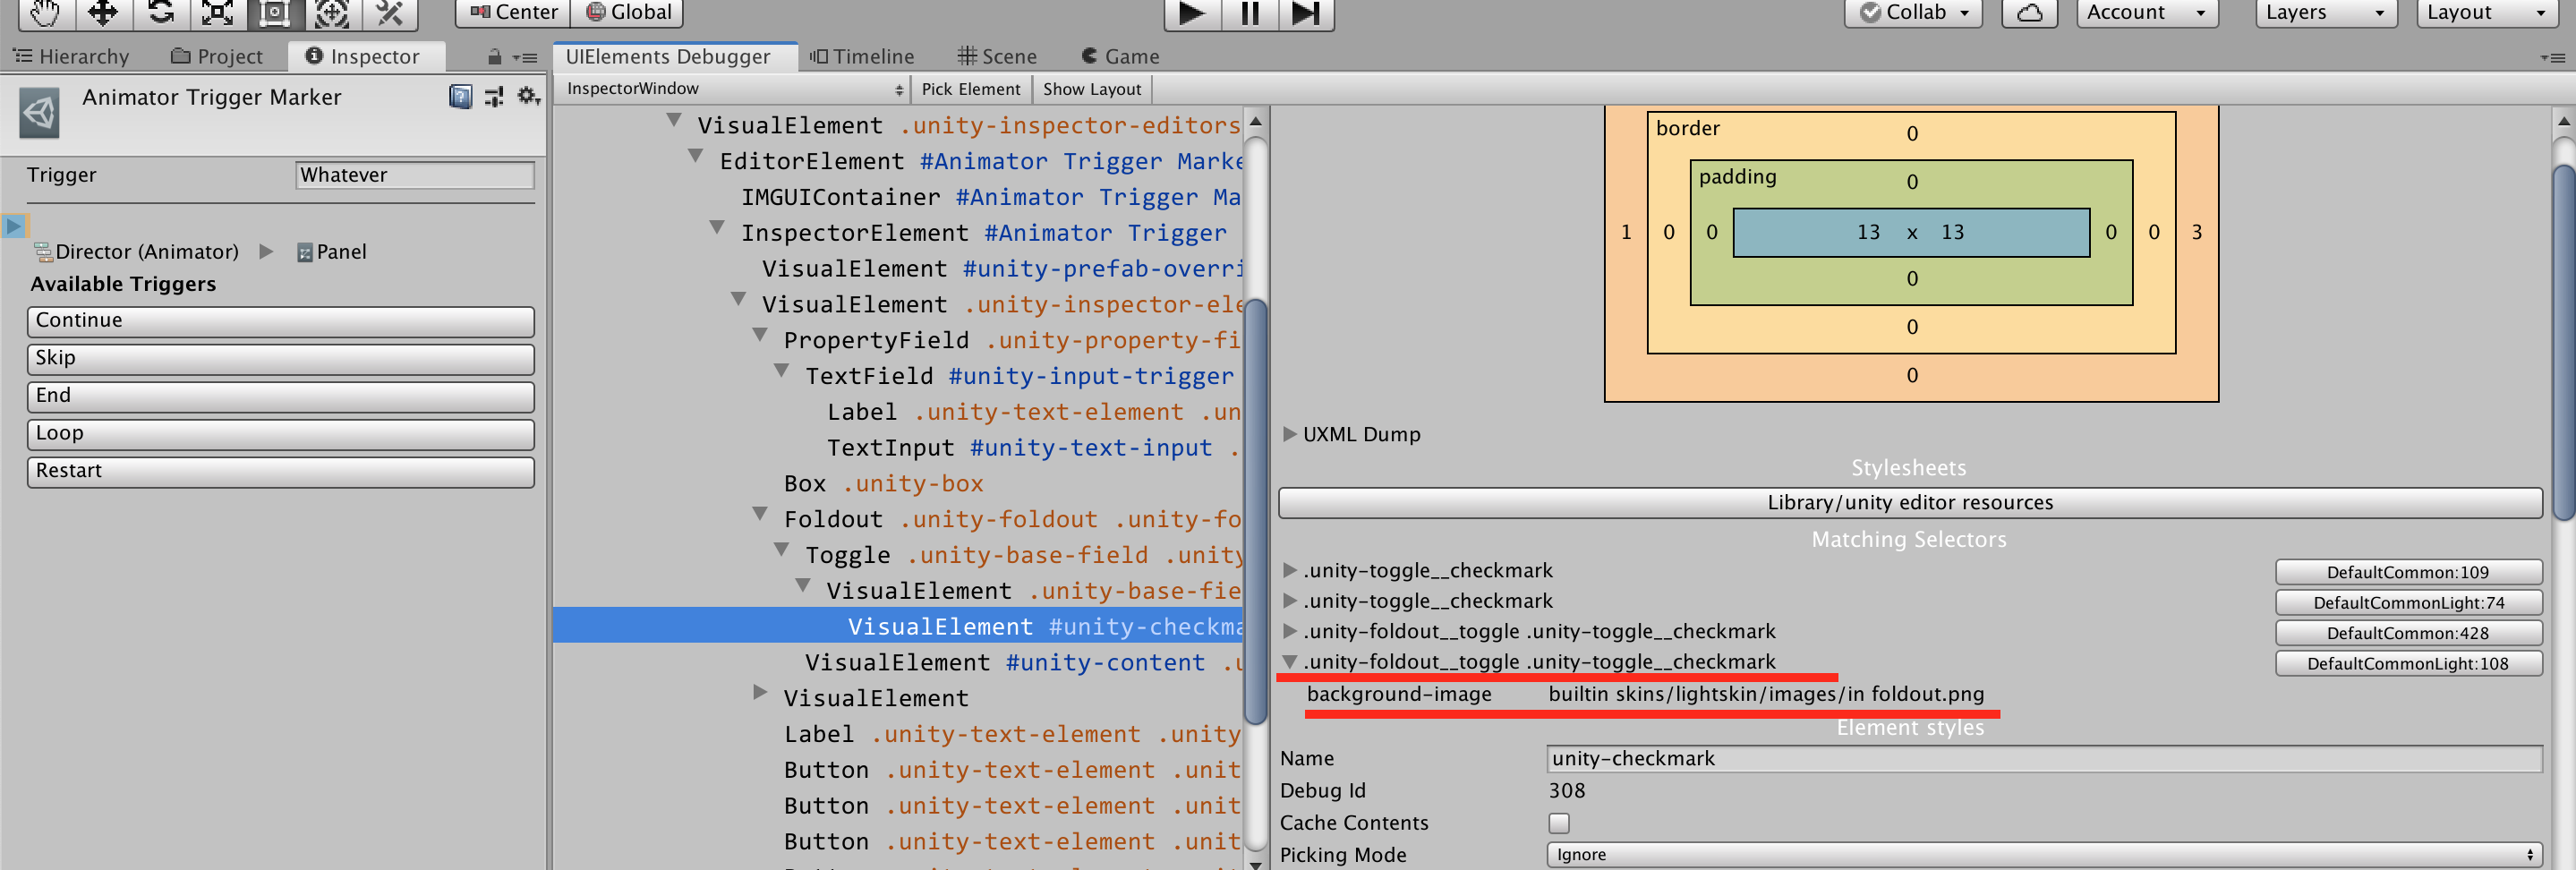
I found that it is unity-foldout__toggle unity-toggle__checkmark, and by CSS selector rules, a whitespace means descendants.
So I know by adding these 2 classes to a nested VisualElement in a specific order, so that the selector triggers, I could get the arrow on my would-have-been-empty VisualElement. This is just like how we make an empty <div class="..."></div> so that class matching magic could add something!
I could even make that arrow a new VisualElement so I could insert a 20-width arrow anywhere I want. The same goes for the whole [X Component] > [Y Field] thing I took the pain creating it earlier, I could make that a new VisualElement for reuse. And maybe make a "factory" for UXML too but I won't cover that here.
Final result
This is what we took all the trouble for! Yes!
Extra
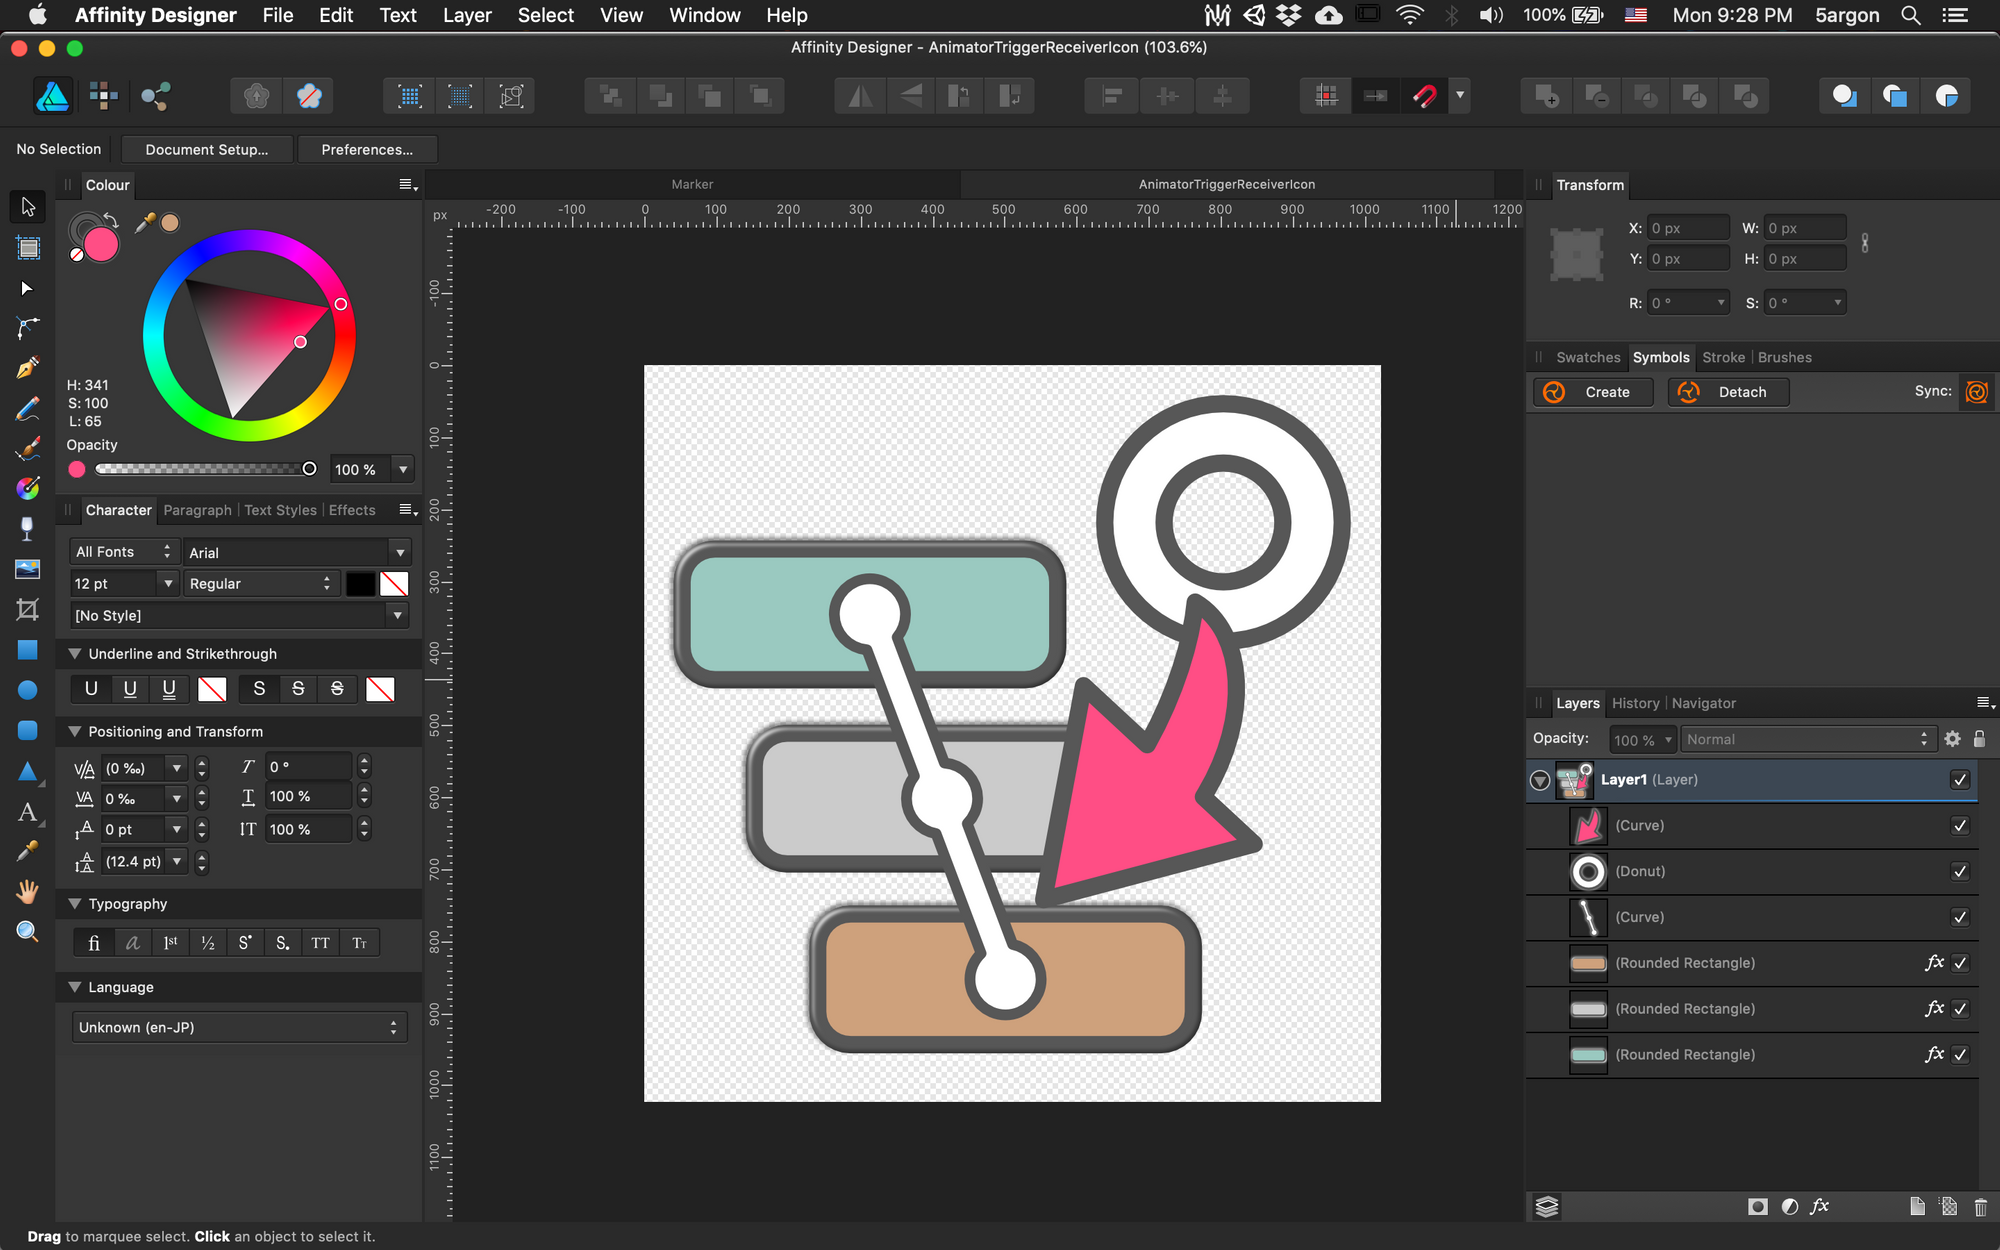
If you want to waste even more time not actually making a game, maybe create an icon for the receiver :
Also the marker itself could be styled by a rather obscure rule too! More on this later... (will update here)


