App promotional screenshots and videos guide 2019
How many resolutions and variants you should plan for submitting to both App Store and Google Play Store?
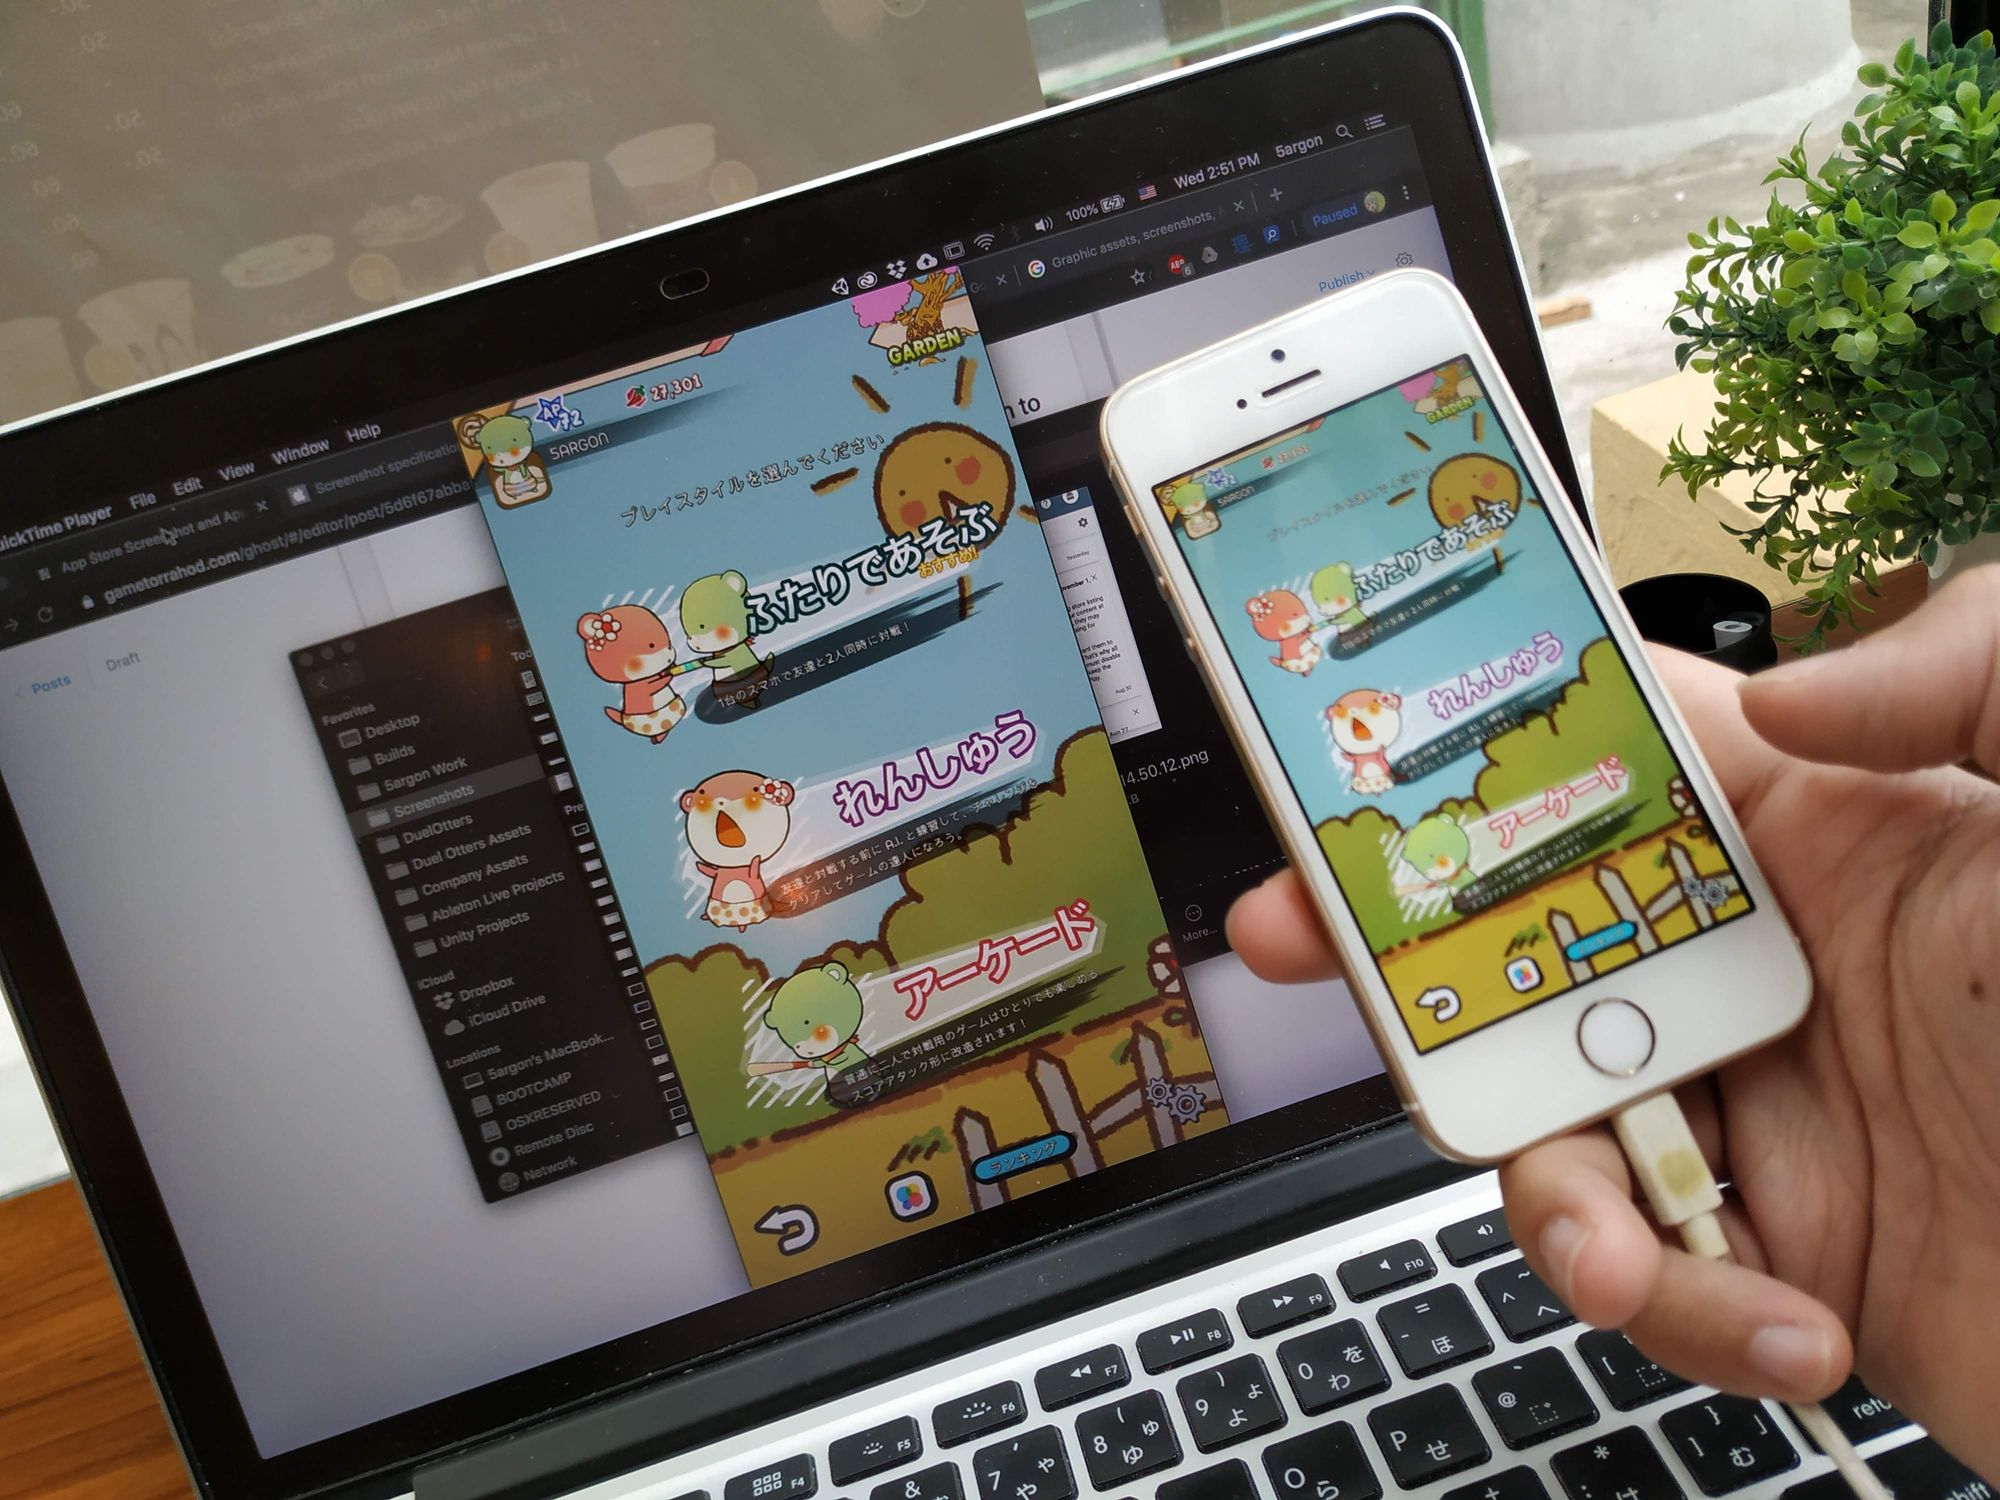
It's been a long time since my latest submit to App Store, back then the name was still iTunes Connect. (Now "App Store Connect" which make much more sense.) I remembered I have to go through hellish million resolutions, variations, and localizations that multiplies up from iPhone 4 through iPhone X, making worse by app preview video feature which is harder to "cheat the resolution" than screenshots.
How's the situation now? (4 September 2019) Much better.
Screenshots
https://help.apple.com/app-store-connect/#/devd274dd925
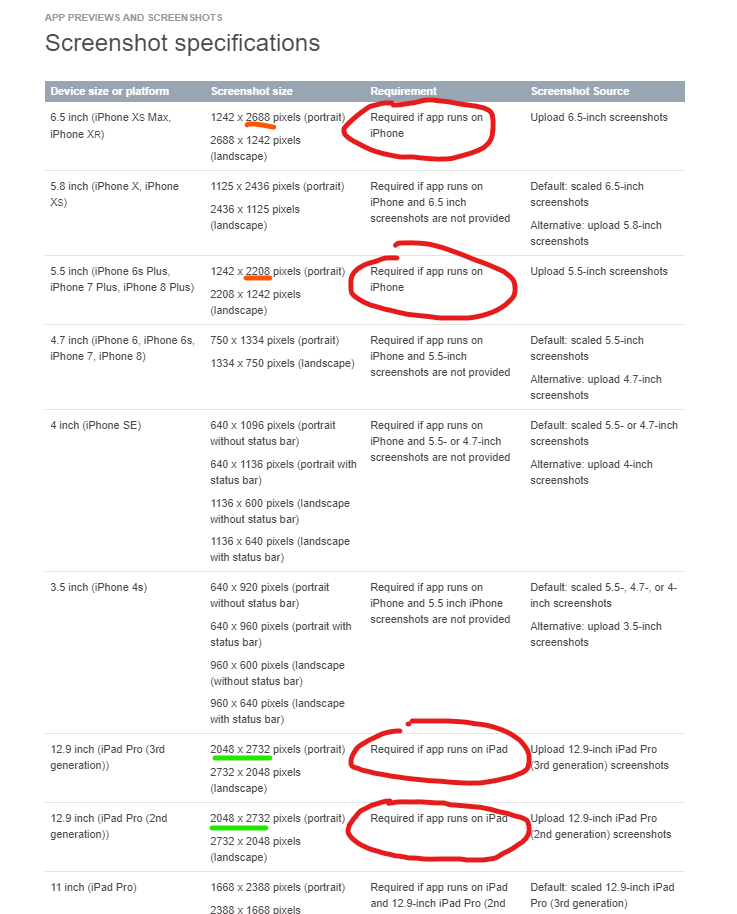
Now you mainly have to make 3 variations (times # of localizations you are willing to do), the other phones can do fallback from those.
- iPhone X (the "long" variant) - 1242 x 2668
- Non-iPhone X (the 16:9 variant) - 1242 x 2208
- iPad - 2048 x 2732
That's quite a lot of pixels! Some observations :
- There are equal amont of short edge pixel (1242) on iPhone X and non-X. It is just the longer side is shorter. So you should start from non-X, then expand the long edge and accommodate the X design. If you start from X variant, then you might have a problem shrinking your layout.
- The iPad requires 2 variants, but you can use the same image since the resolution is the same. The reason why 3rd generation iPad Pro is a separated entry is because it got rounded corners. If you got an sharp corner in your design you may want to adapt it up a bit.
Therefore tactics for this is to use artboard feature in your art program as a representation of each variants, then the content inside it should be "instanced" from a symbol feature. Modern vector software like Adobe Illustrator or Affinity Designer could do this.
The symbol will sync its content except the top level transform, (much like Unity's prefab system) so you could vary things up. You may found that your iPhone X variant got more vertical room to space things out, or your iPad variant got more side area to scale things out more.
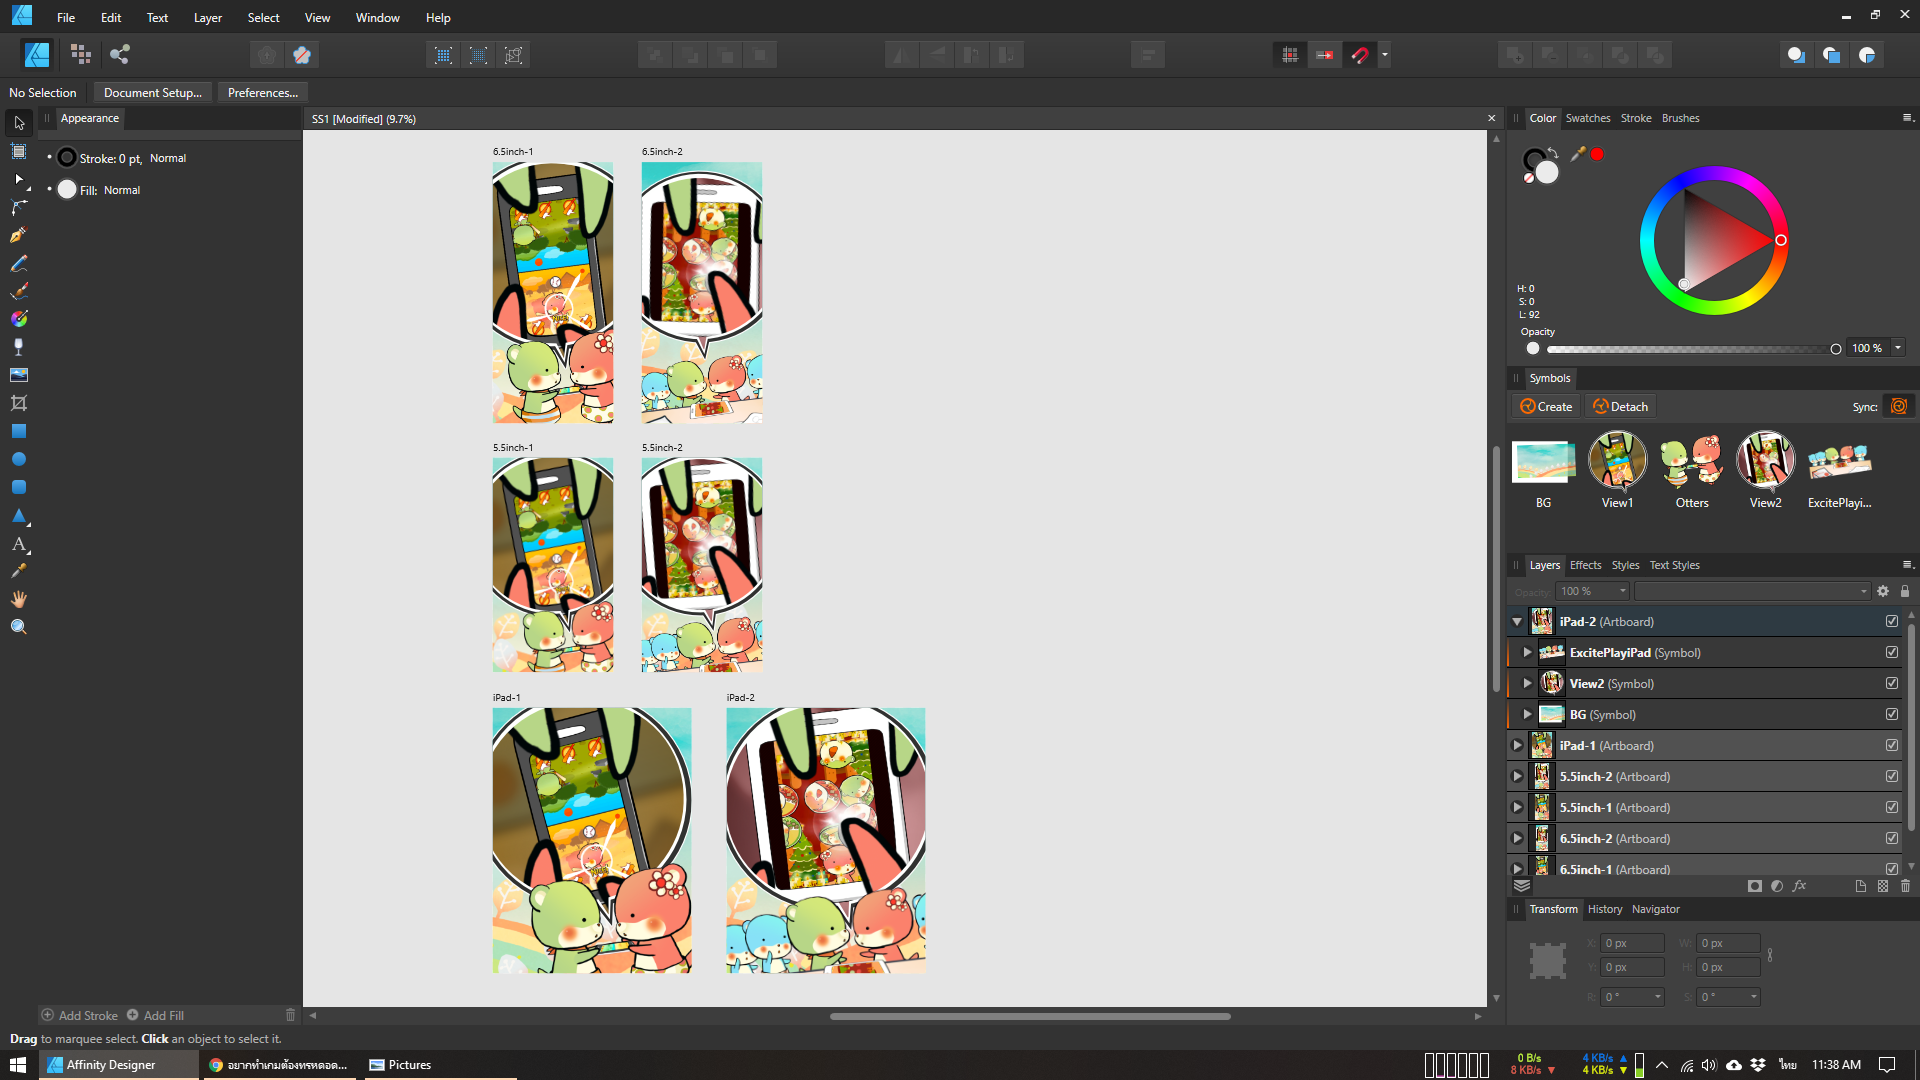
Then your program should be able to mass-export artboards in one click. You will thank the symbol feature when you want to do localization which multiplies the work you need to do.
Number of screenshots updated
Apple used to allow only 3 or 4 screenshots if I remembered correctly. Now you can do up to 10! Previously Android could do more, so you have to pick some subset for iOS. No more of that.
Android's side
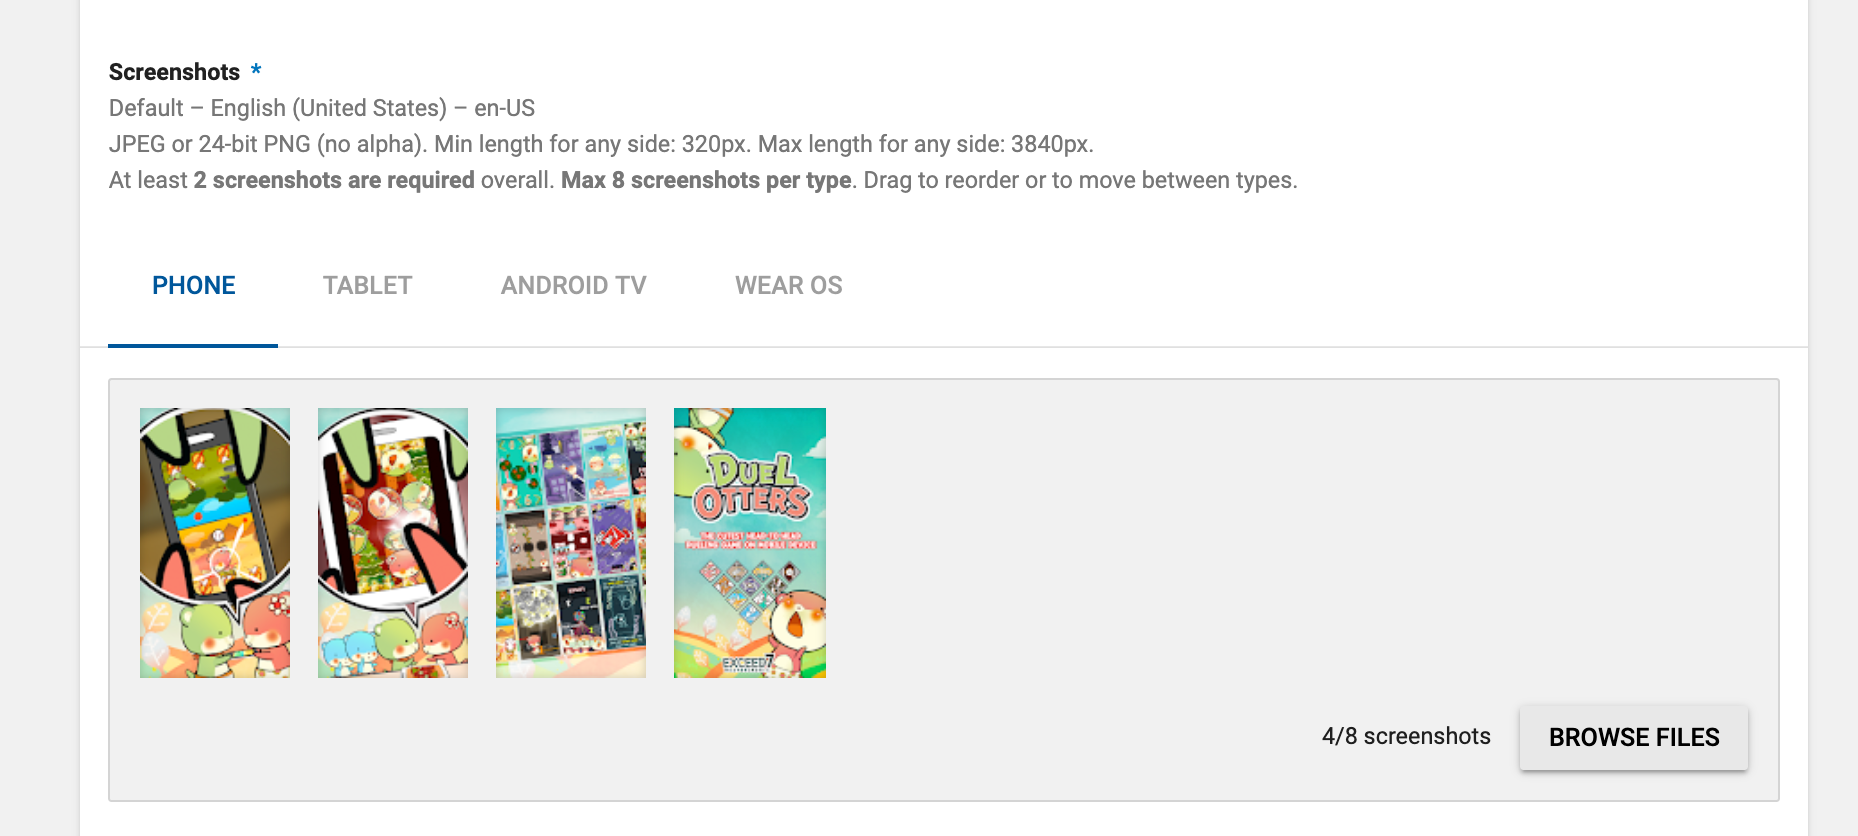
Android have no resultion restrictions other than max 3840. So first just make things OK for iOS then pick the X or non-X for PHONE section, then pick iPad for TABLET section. Done! If you used 10 screenshots for iOS, you have to reduce it to 8 for Android.
App Previews (Video)
https://help.apple.com/app-store-connect/#/dev4e413fcb8
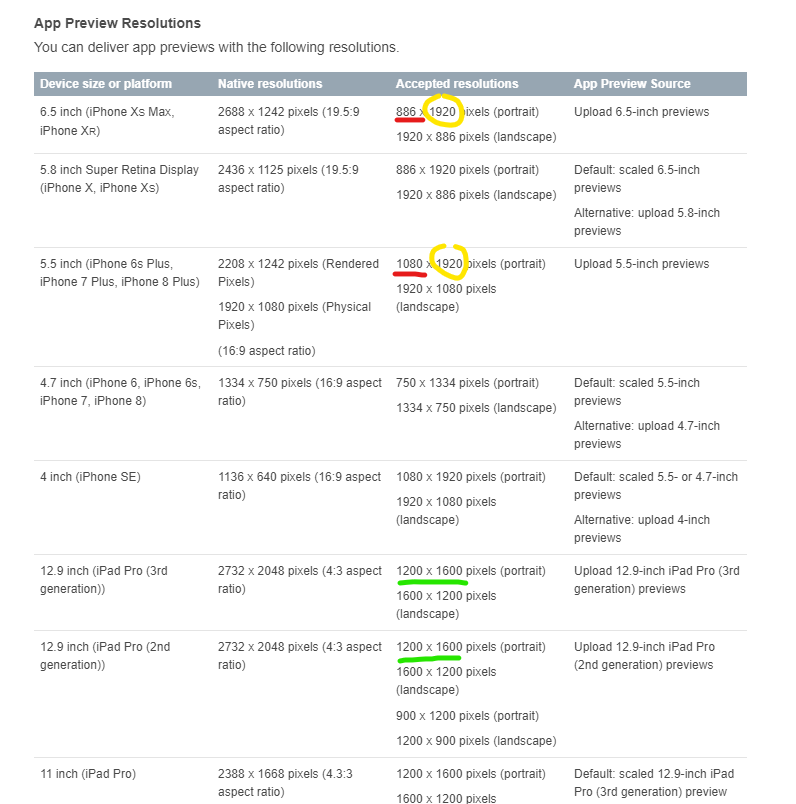
Some observations :
- The X and non-X variant is a little different this time. The longest edge is locked to a constant 1920, that means we are varying the short edge and this time non-X actually got more pixels than X variant! Beware of this difference.
- The iPad is still using the same 4:3 pixels. The different is just rounded corners on 3rd gen iPad Pro.
Then the video format, the FPS is 30.
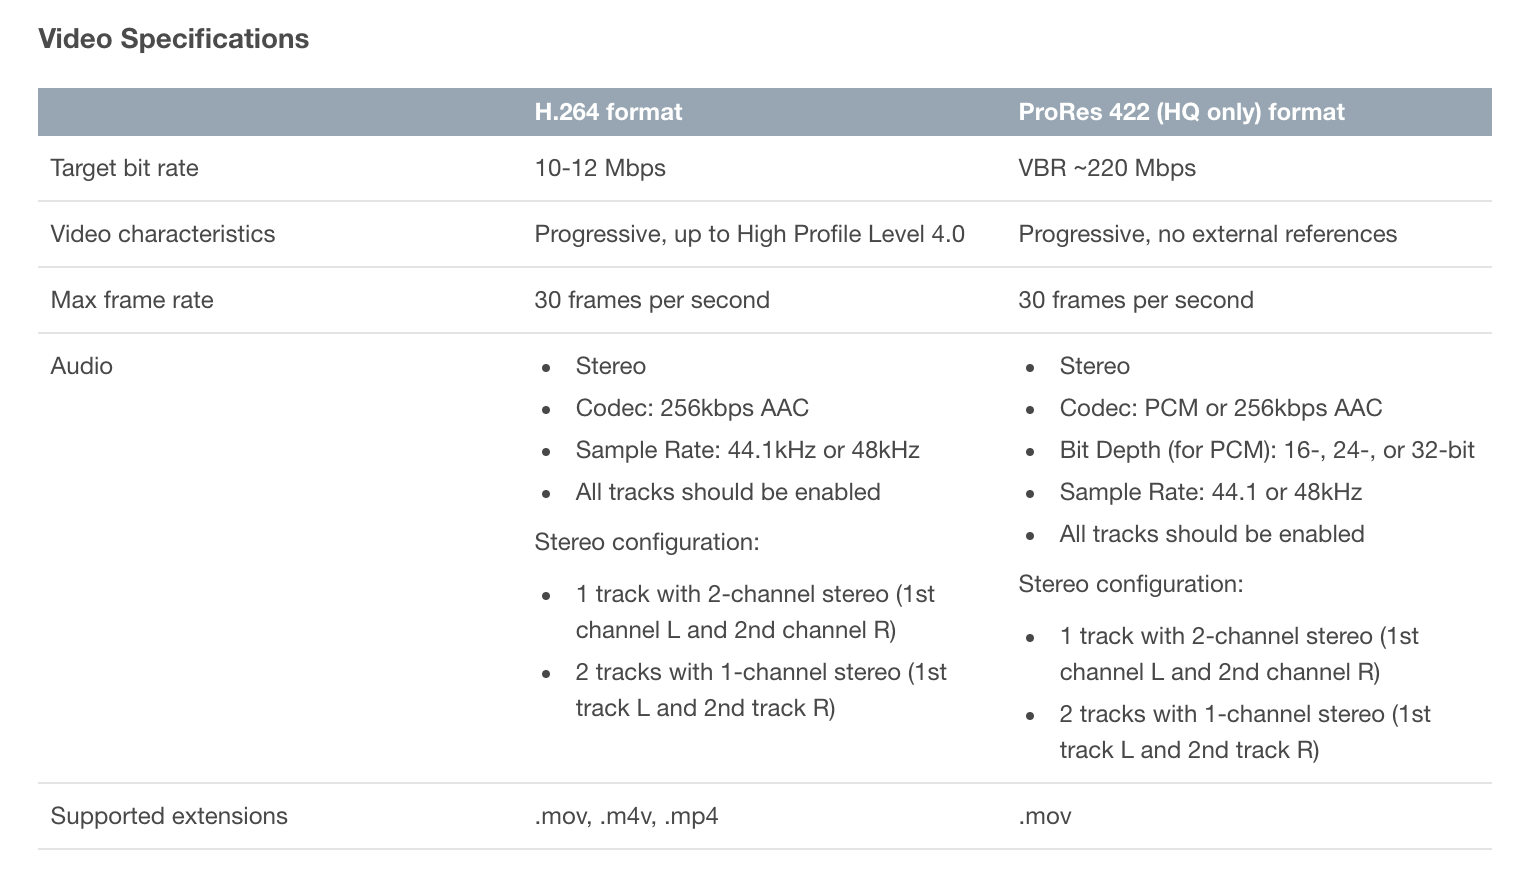
Also note that this video is supposed to be the actual game screen. If you submit something like a live video of real human playing the game it might be rejected by Apple according to the guidelines. Using text ("copy") overlay onto the video is fine, as the video starts of muted.
https://developer.apple.com/app-store/app-previews/
App previews may only use captured footage of the app itself. Don’t film people interacting with the device (such as over-the-shoulder angles or fingers tapping the screen), and don’t use app previews to show behind-the-scenes footage of your app’s development. Stay within the app.
One final tips, leave only SFX in your game on is a generally good idea. It allows you to rearrange your clips then overlay it with cohesive BGM later in the video editor.
Number of videos updated
Apple used to allow only 1, but now you can do up to 3 videos. You can use the 2nd and 3rd video to highlight other features while the 1st one get to the point of the game quickly.
Android's side
You can just put any YouTube video link. Easy.

Also there is a small recent update about the video :
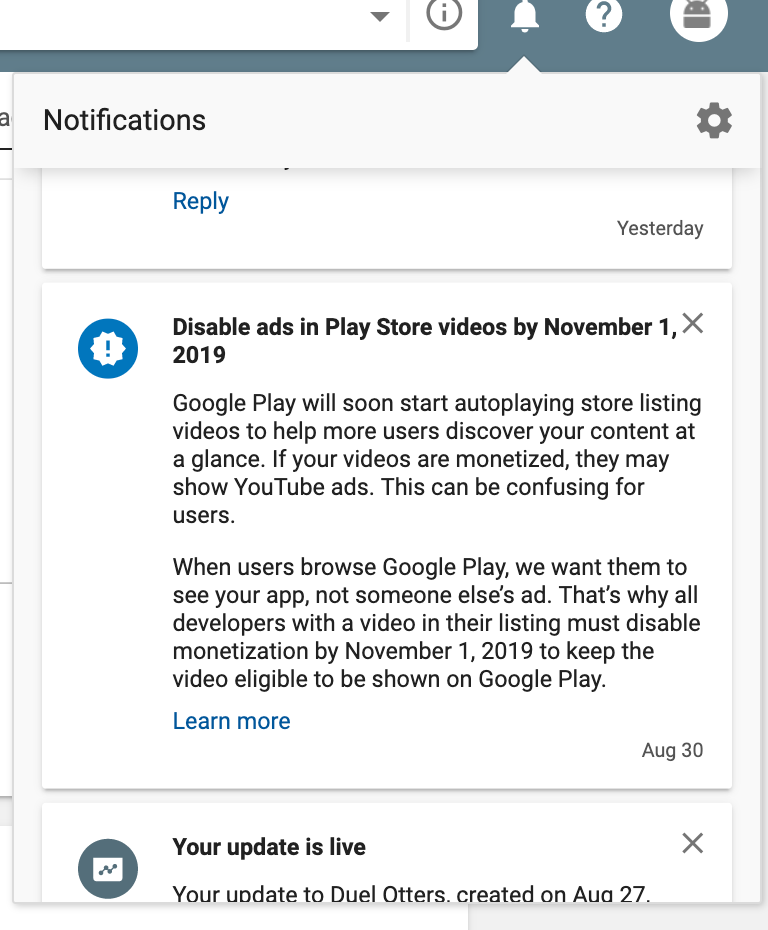
https://support.google.com/googleplay/android-developer/answer/1078870#promo_video_requirements
How to record the video?
Wired recording
If you got some Apple devices, Quicktime is still the best at doing this. I don't know why the other software keep doing the stupid wireless thing.
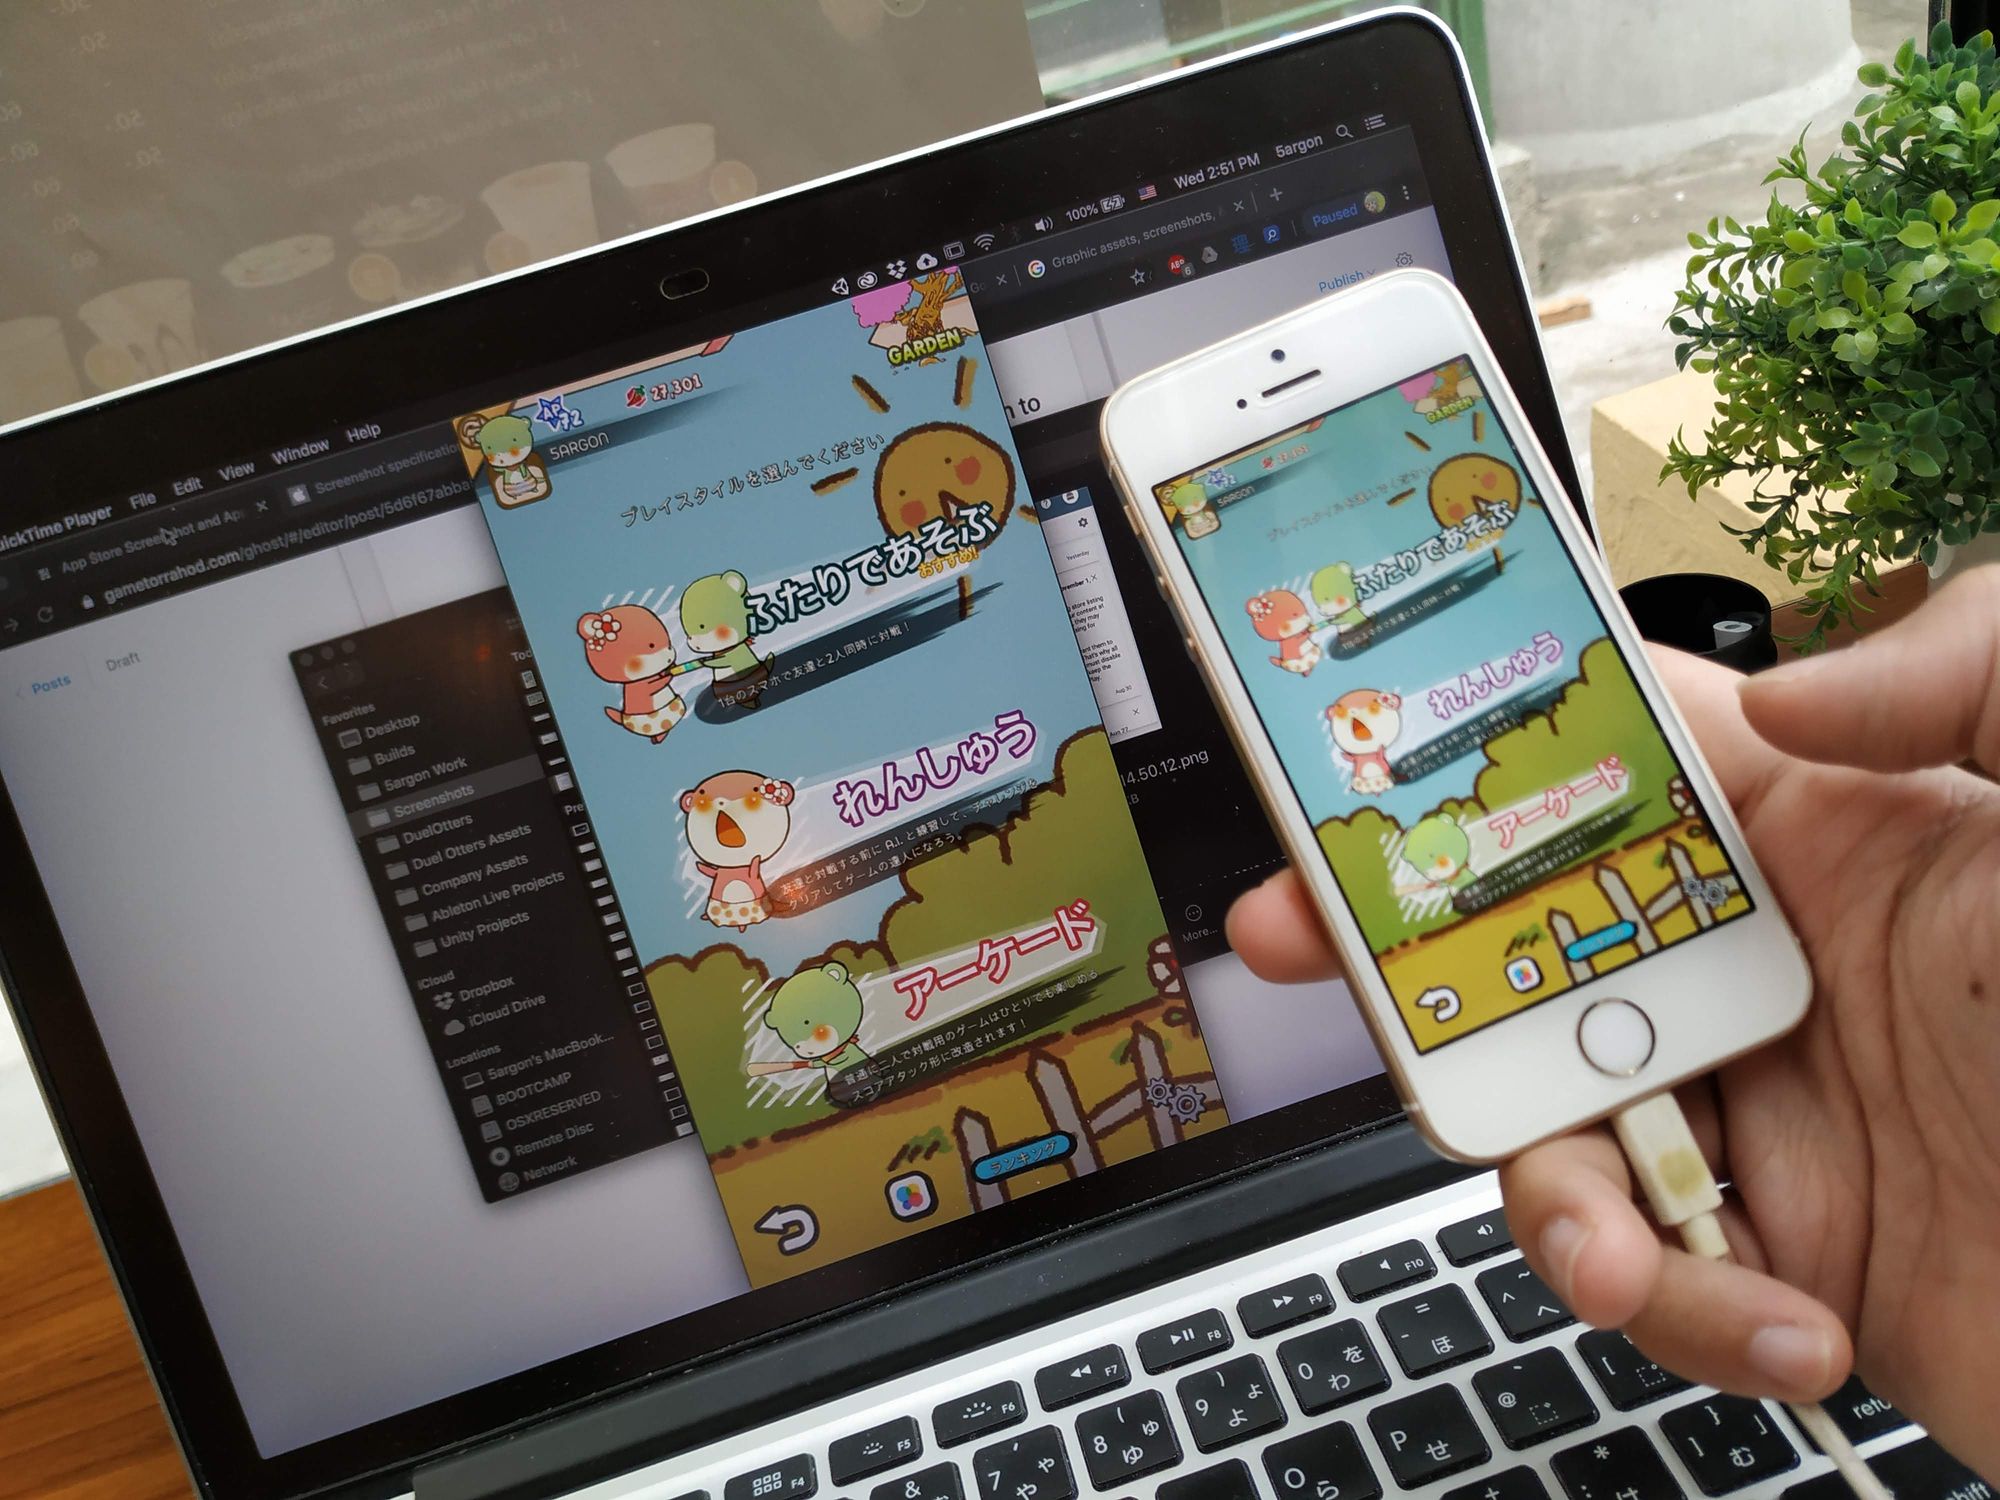
- Over the USB recording from the real device. By using the real device, there is no need to fumble with a less intuitive mouse to setup your "real" situation.
- The audio also comes along with the picture and you can monitor on your computer. It's on sync, perfect. But it's muted on the device.
- Very low performance hit on your computer. Also there is no lag at all on the phone. It's truly magical how Apple did this. Also the space recorded is taken on the computer not on the phone.
- On Android, Google Play Games could do screen recording but it is very taxing on the phone, and it is saving files on the phone which take massive space.
- Cons : You cannot switch variants other than connecting a new device. I don't have an iPad, for example.
- Cons : You cannot hack the game to be the way you want.
I think this is the best if you got 3 variants of Apple devices plus a macOS device. That's of course not cheap. You may instead record from what you have then letterbox your video to the other resolutions. For example, I got an iPhone SE (16:9) which is on the middle of both extremes. If I want to use the clip recorded for X variant and iPad variant, this is how the letterbox would looks like.
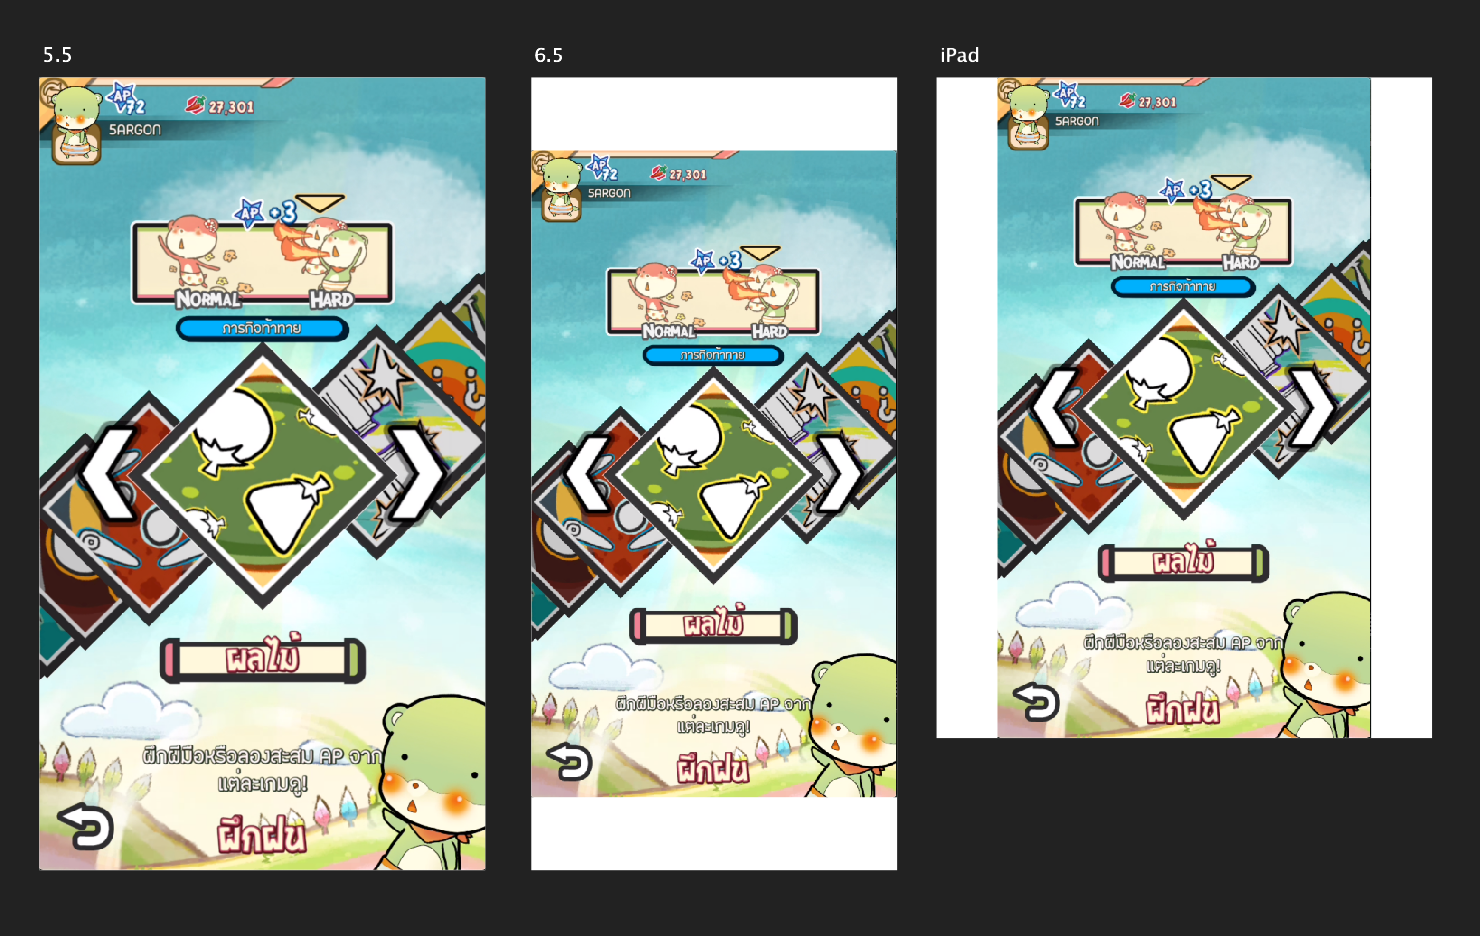
I don't think I know any Android solution that can send a picture over USB as good as Quicktime + Lightning cable. So props to Apple for this innovation.
On-device recording
On Android you can use Google Play Games, or adb shell screenrecord. It has tendency to lag the phone into unplayable state, however. Also there are usually problems with audio, so prepare to record them separately then assemble up later. (It is useful to do something stupid in the game as a landmark, then you know which point to sync the audio later.)
Screen mirroring
The thing about these softwares are that they are usually over the wireless, which introduces a can of worms. Such as quality dynamically degrading, audio offsync, etc. (The footages are not "pure".)
I have reviewed some from a very long time which all uses AirPlay protocol of Apple. (Intended to air your screen to big TV, but these softwares let you air to your computer's screen.) You might be wondering why I am not using Quicktime, but my iPad is so old it doesn't have Lightning cable, and thus cannot do USB Quicktime recording. Now they might be better, and I didn't try the Android side.
- Your computer is the one recording it, it will not tax the phone.
Or you can use streaming software which is a form of screen mirroring I guess, then download your own past stream later when it finished processing. How to do this I am not well versed since I am not a streamer, even more so not sure how to get phone screen on the stream. Please research by yourself.
Simulators
Xcode, Android Studio, and Bluestacks for example, can run your built app on the computer screen without an actual device. So then you could screen record over it with something like OBS. I guess you must have a decent PC however, and if it lags then you get a lagged clip.
Camera-over-phone
Well I did this before... so you get a tripod and point your camera to the phone. You don't need a powerful PC nor powerful phone this way, just a subpar recording camera. (An another phone, or DSLR) However you cannot touch the screen as your finger will get into the clip, and turns out you can only record barely moving UI screen or cutscenes, lol. Then in your video editor, you can use corner stretch/wrapping effect to remove the perspective it may introduces and voila! You can get an audio into DSLR via its line in port. However I find that it is offsynched (on my D5200), at least it is together with the clip instead of a separated file. This section is a joke so do not actually do this.
Game Engine
Recording from the game engine requires more specs of your computer however :
- You can make it change to any aspect ratio quickly.
- The quality is at maximum. The images comes directly from the engine after all. This is the "purest" form possible of your game.
- You can hack the game to go to the place or being at a situation you want quickly.
- Cons : You need a good PC.
- Cons : Input with mouse maybe awkward when recording.
- (Unity) You can use Unity Remote to allow more intuitive touch input while recording. I am not sure if Unreal could do this or not.
- (Unity) You can use Unity Recorder for engine-level recording. You will not miss any frames as opposed to use screen recording on top of your engine's viewport like OBS which will depends on how well your PC perform. I am not sure if Unreal could do this or not.
How to use the Unity Recorder
If you are using Unity, here's how to get things going. First get the UPM package.
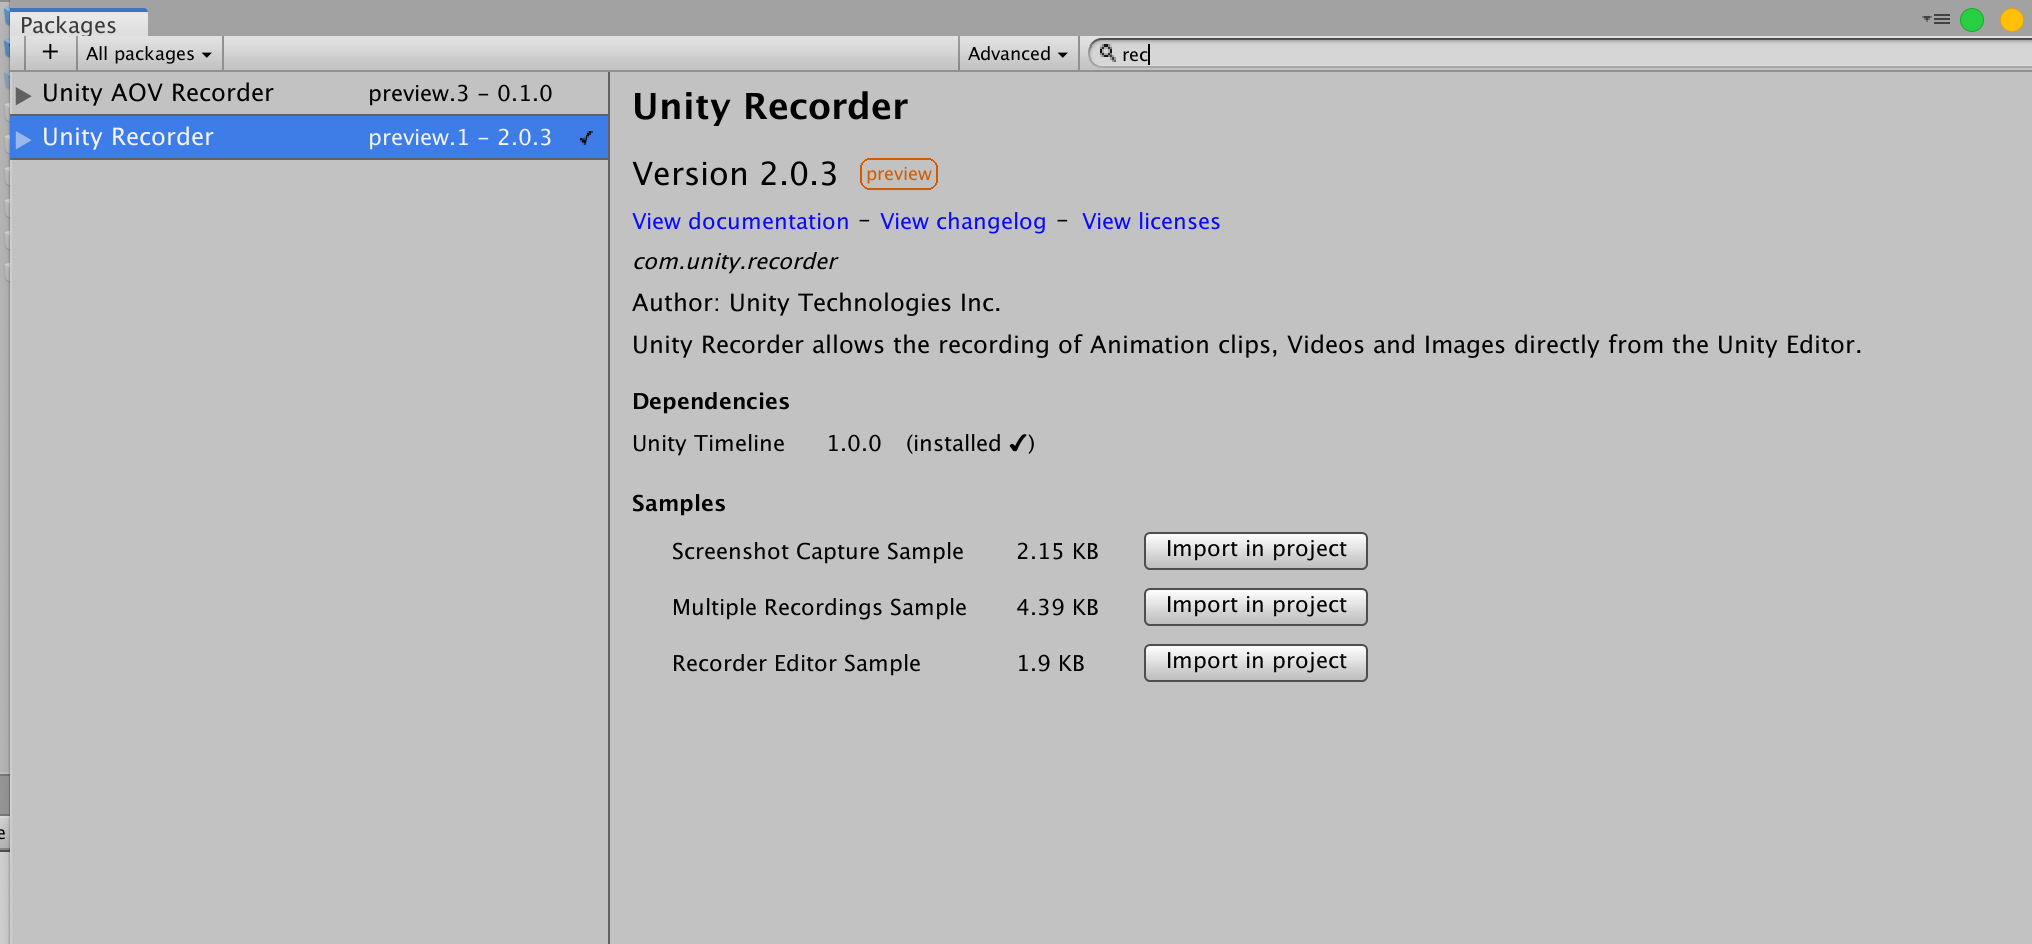
Then add exact fixed resolution for 3 variants. All the available ones on iOS build are either too large or costing your PC much more than you should.
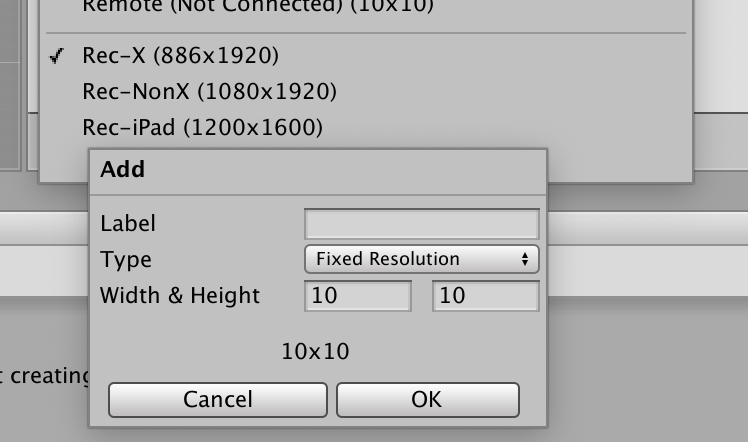
Finally
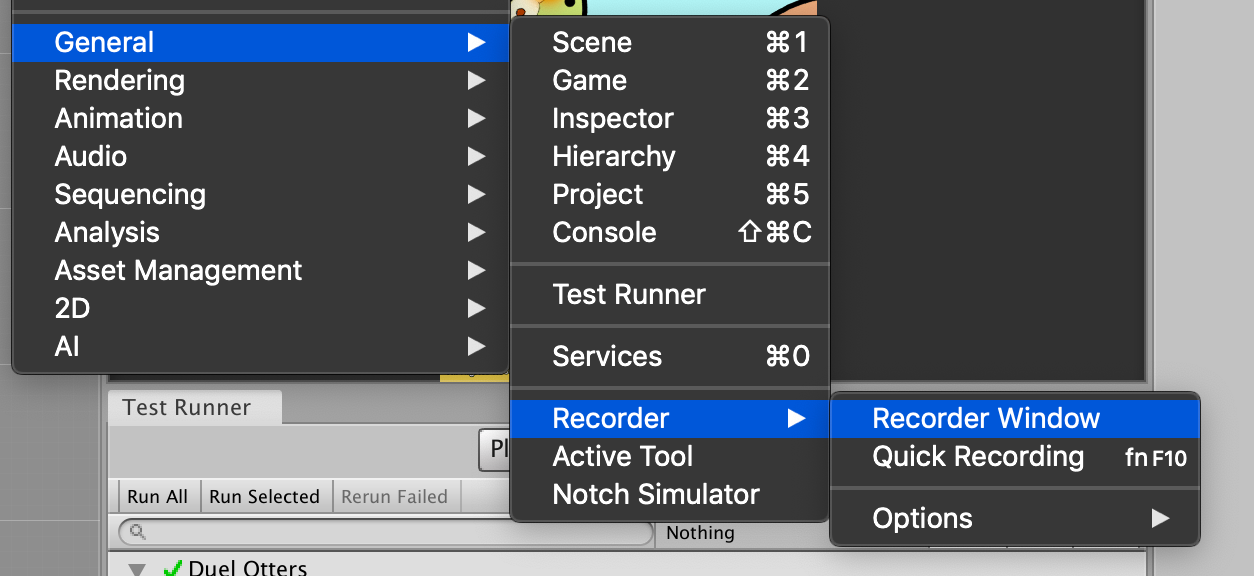
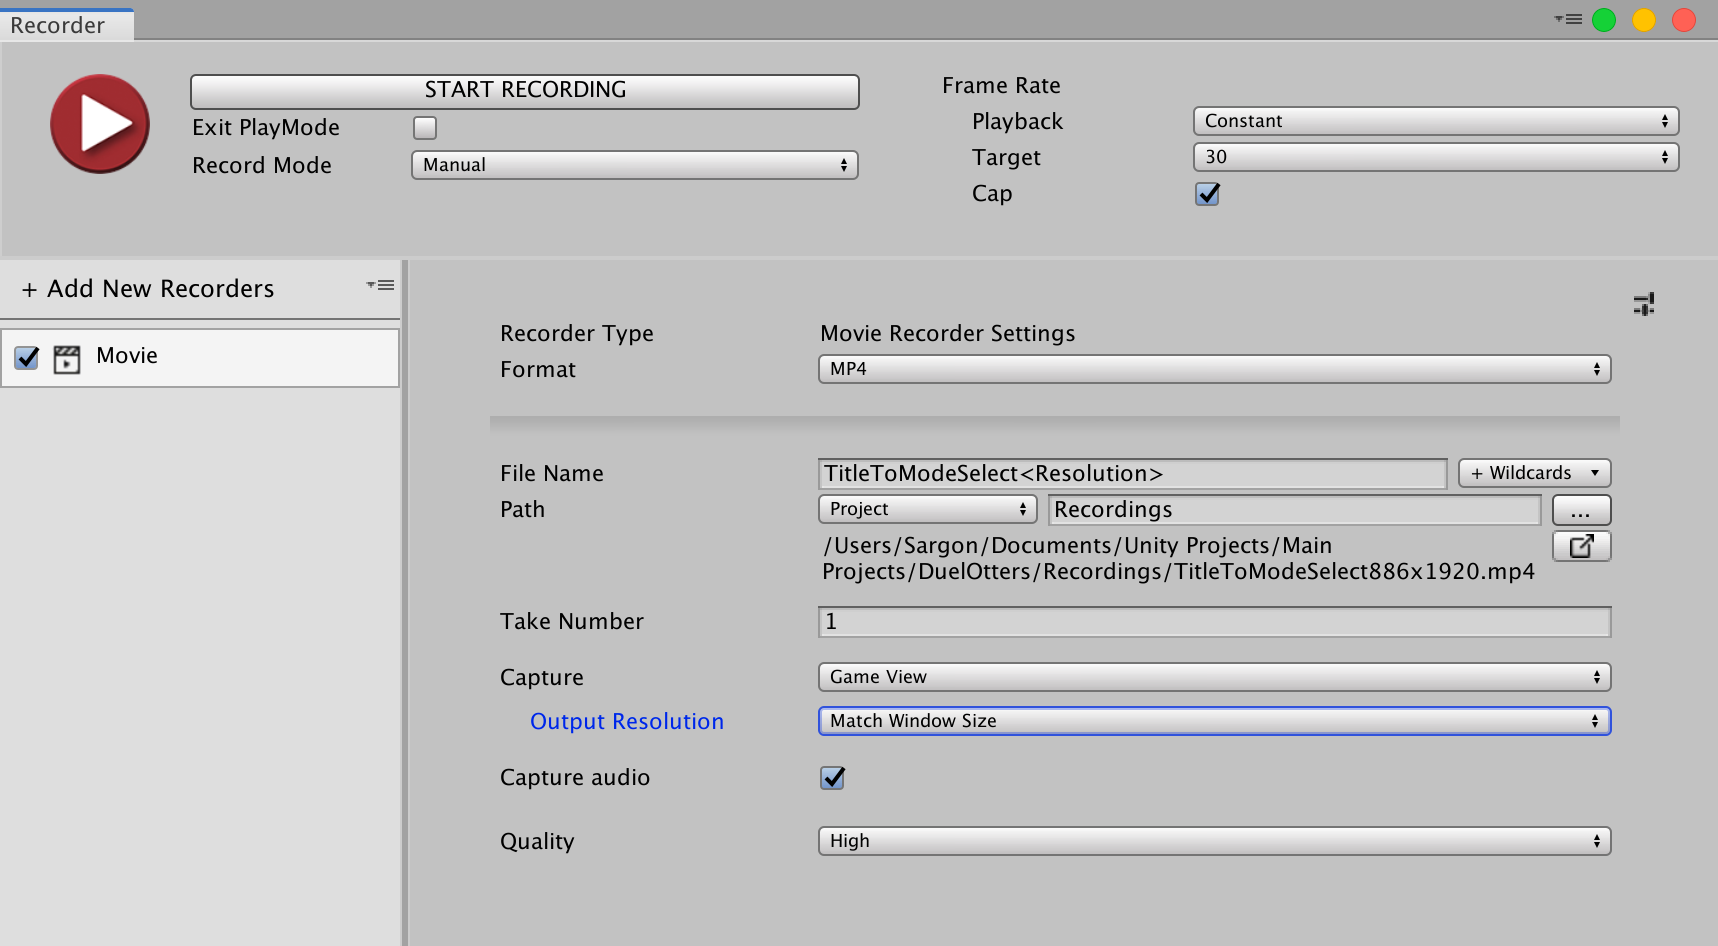
You can use "Match Window Size" here, the output video would then have the exact pixels usable in your video editor.
Then press Quick Recording hotkey and it will enter play mode with recorder running. If you got a not so powerful PC then your gameplay maybe sluggish, but it is saving all the frames and the video will comes out perfect. I used Unity Recorder as a "renderer" of a hobby music video project before. And that's perfect because I got everything going with scene and Timeline. I don't need to interact with the game at all and I just left it running slowly, but creating a perfect clip.
However this is a problem if you must "play" the game as it records. You can code up some automation for this, or find a more powerful PC, or simply record using other methods. If you have a good enough PC that it still runs smoothly, download Unity Remote 5 as a supplement to stage your clip with touch input.
As far as I know it is not possible to record multiple screen size at the same time. In Unity, you must "be" in a single resolution so all the things know how to positon itself.
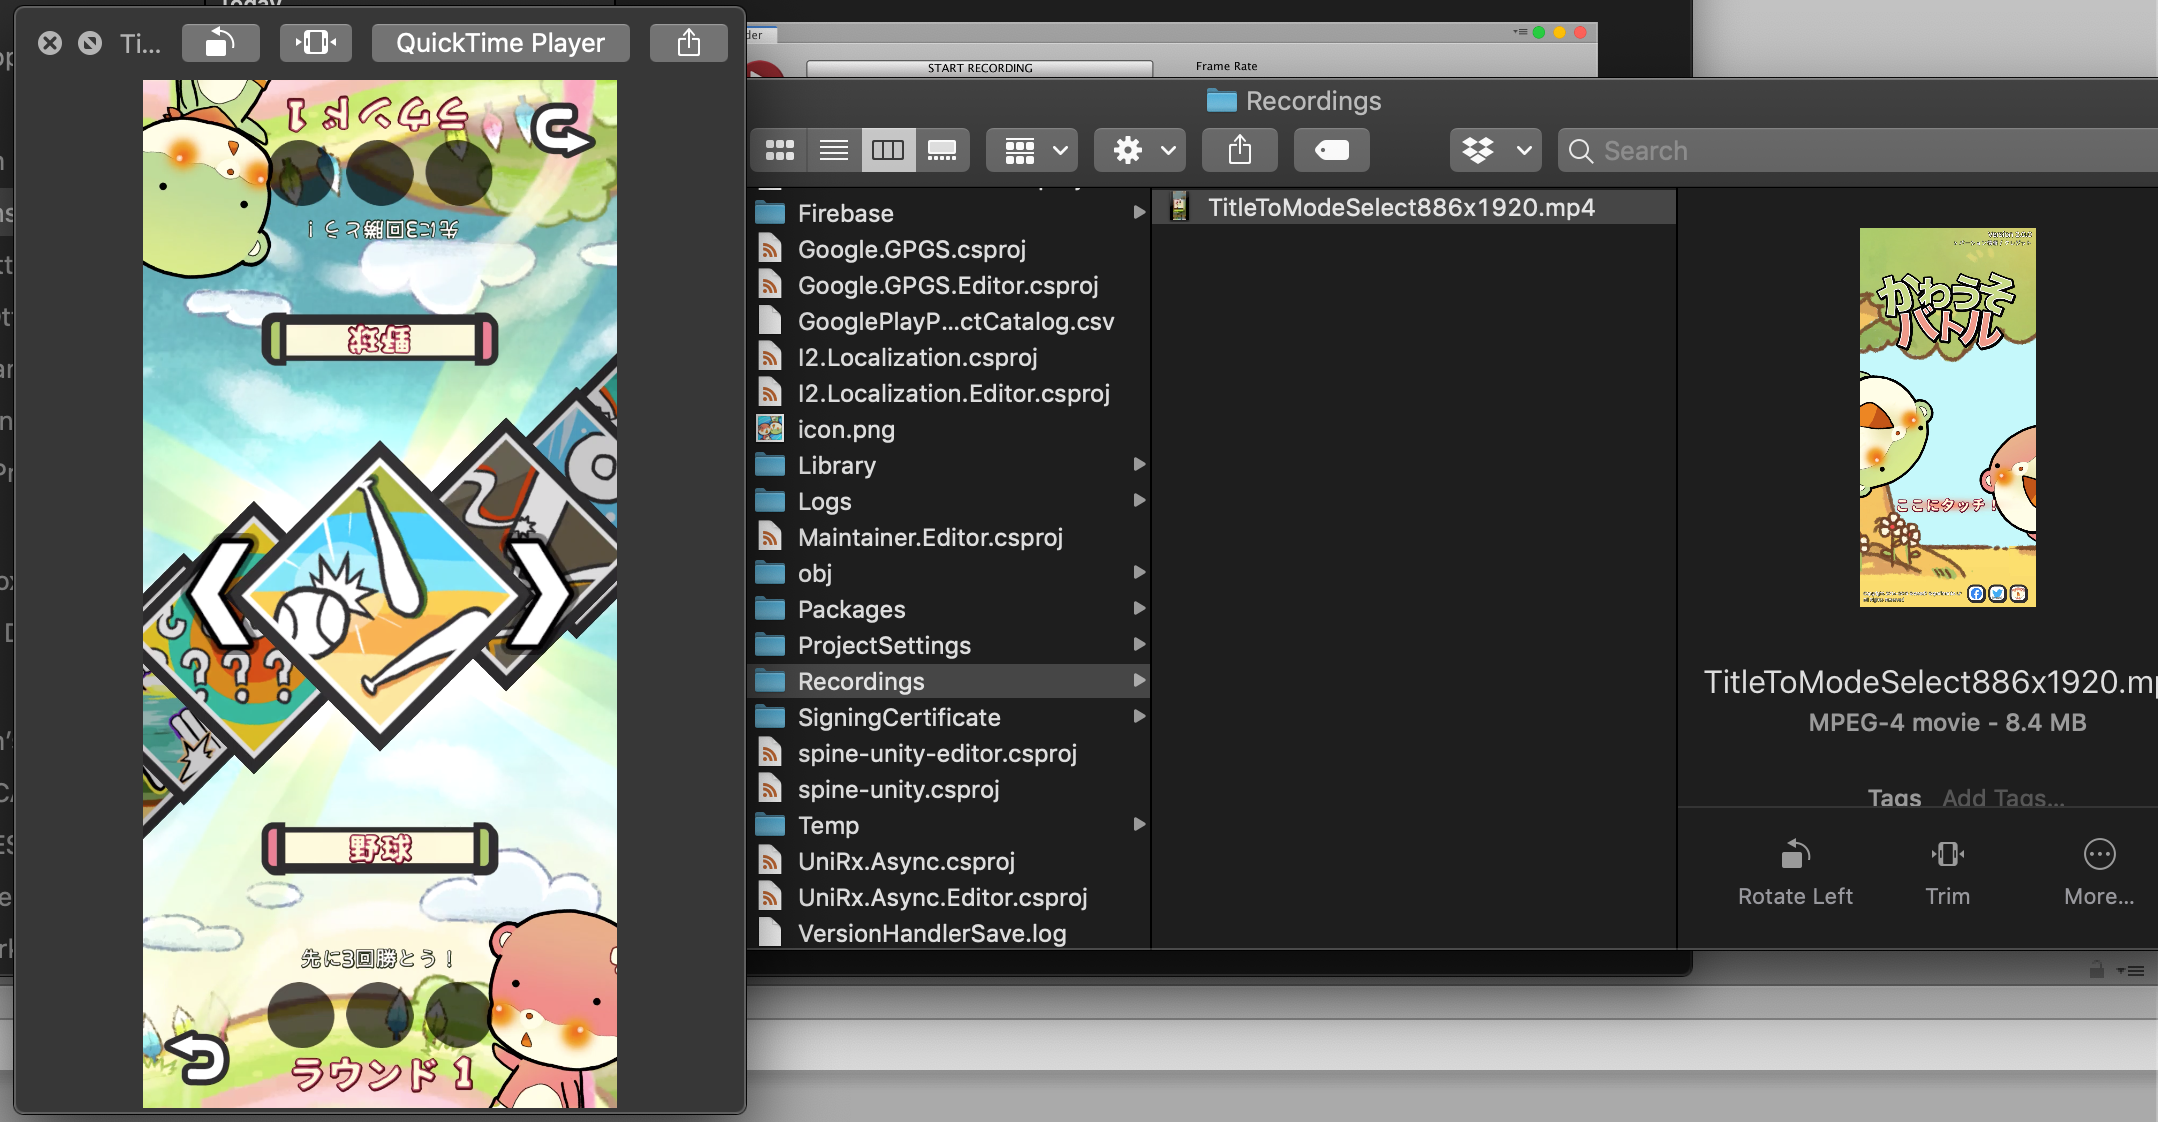
After this, check out the output directory. The "take number" will be ++ 'ed after you finish the recording.
Press kits
Content creators will love you if you hand them a pack of ready-to-use high quality images, so they can focus on praising/bashing you while racking in ads revenue. The best way to get these is from the game engine. Luckily it is much easier then video.
Ideally you should use your game engine's API that could access render buffer or something, not pressing the print screen on your computer and crop the engine's screen. For example with Unity Recorder, you can actually export stills larger than currently shown on Game tab with this setup :
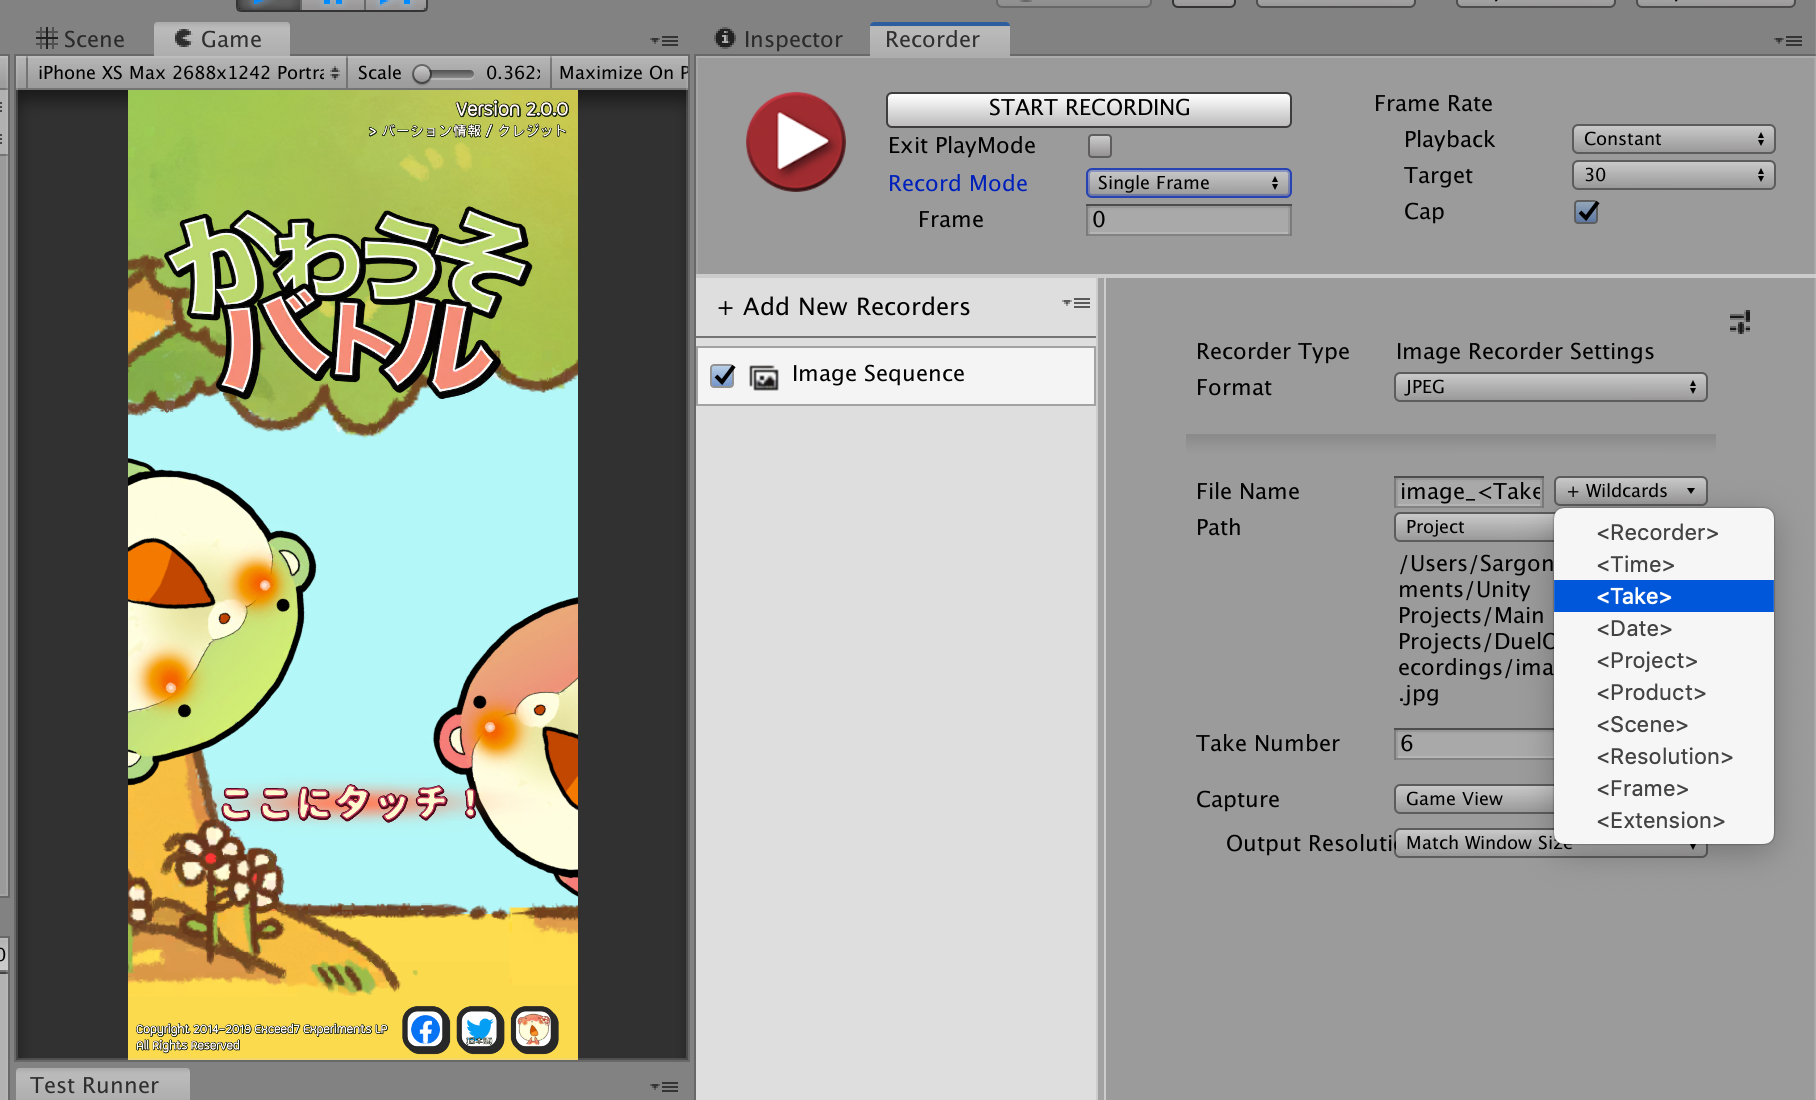
The "Single Frame" let you push "START RECORDING" (or F10) like screen capture button anytime in play mode. The "Take" added to wildcards section ensure that the file is not overwriting over itself on multiple press.
Or you can also export stills from the video, which the pros is that you can choose a good frame where there are effects and bombs that are at the frame where they looks nice. If there is no such frames, consider editing in a fake effect. After Effects and Davinci Resolve can both capture a still to a new file.